Smart Camera Feeder Support
Smart Camera Feeder Support
In-App Pairing
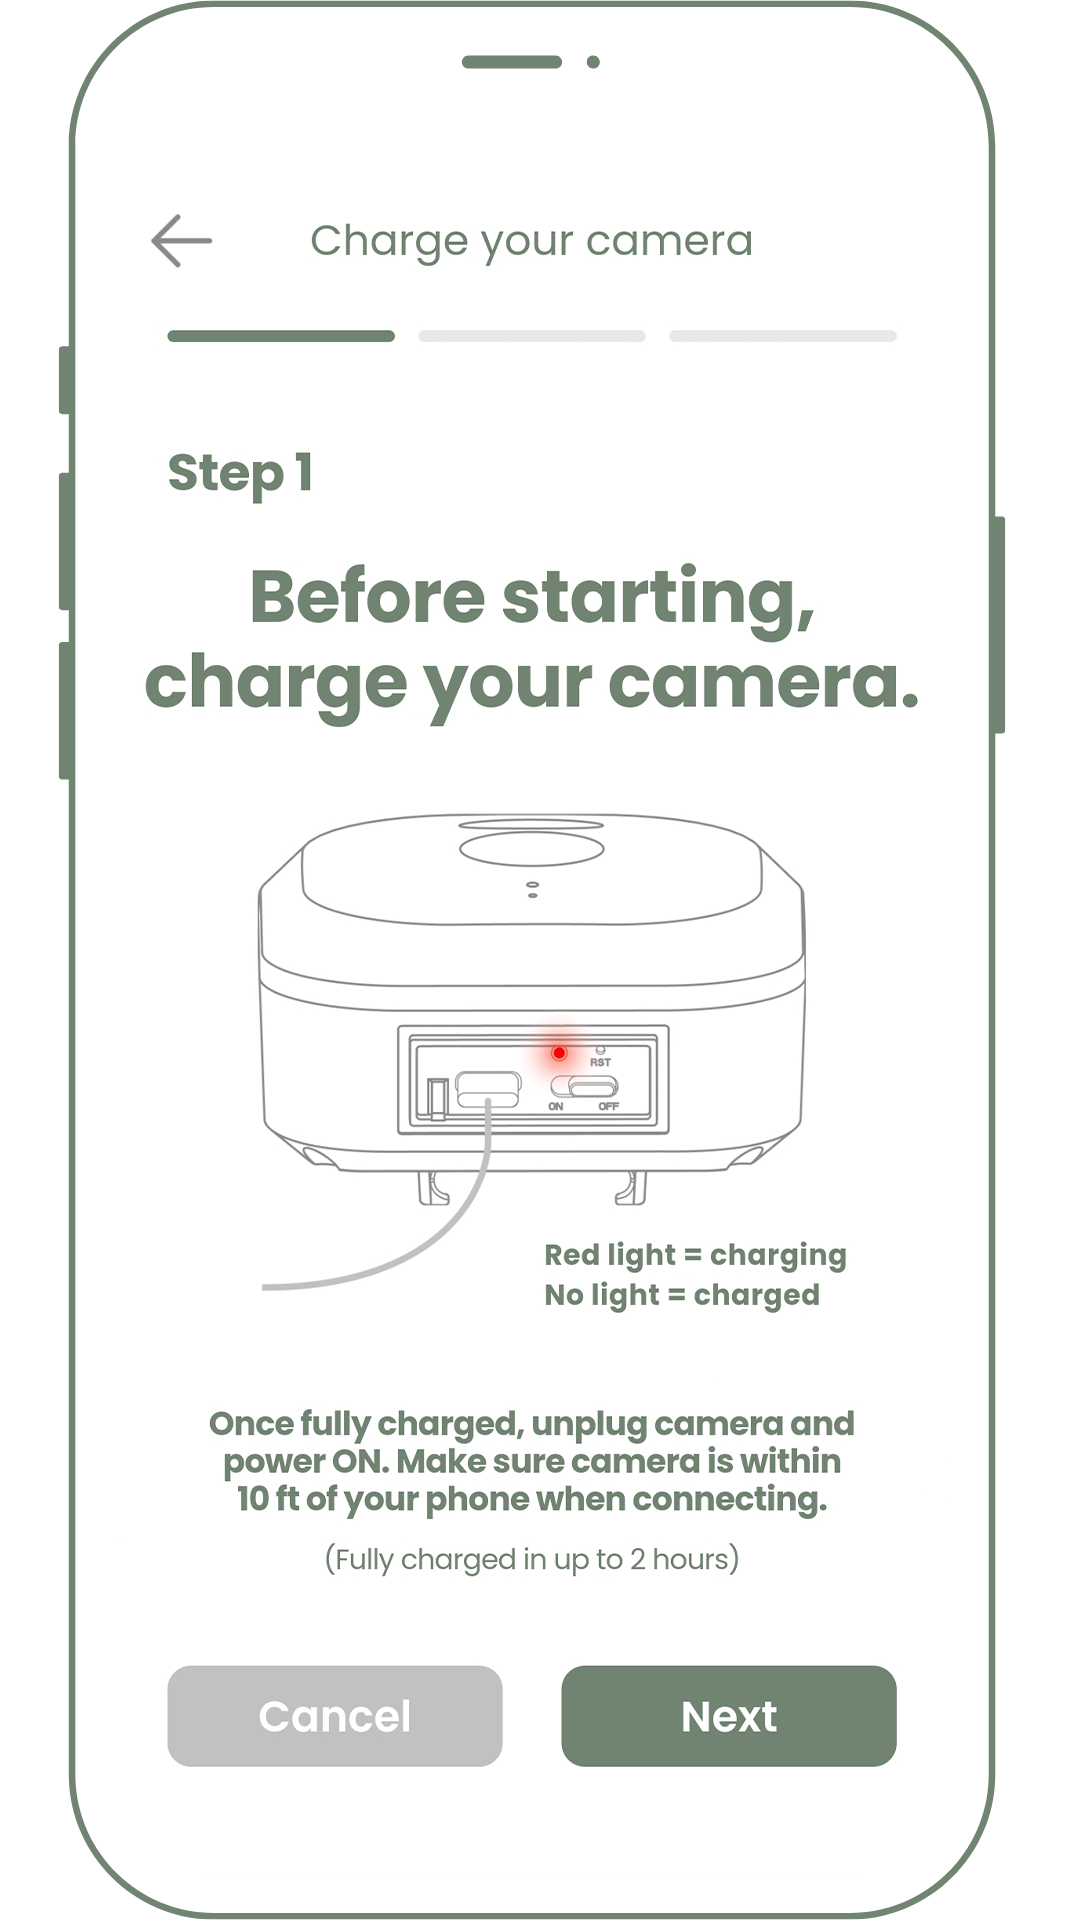
It’s finally here – your Perky-Pet® Smart Camera Feeder! We can’t wait for you to get started, and the birds are eager too. Before you begin, make sure to charge your camera. Attempting to pair the camera while it is still charging (plugged in) may lead to a failed pairing attempt, so it’s essential to fully charge and unplug the camera before starting the pairing process.
Once you download the Perky-Pet® App and create your account, it’s time to begin pairing! The app will guide you through the steps to connect your feeder. For a detailed overview of the in-app pairing process, follow along below.
Add feeder

- Before you begin pairing your feeder, make sure to enable Bluetooth on your mobile device. Bluetooth is required to make the initial connection from the camera to your smartphone. Once you’ve completed the pairing process, Bluetooth will no longer be needed. You can enable Bluetooth in your system settings.
- From the Home page of the app, click + in the upper right corner.
- Select “Set Up Your New Feeder” from the list.
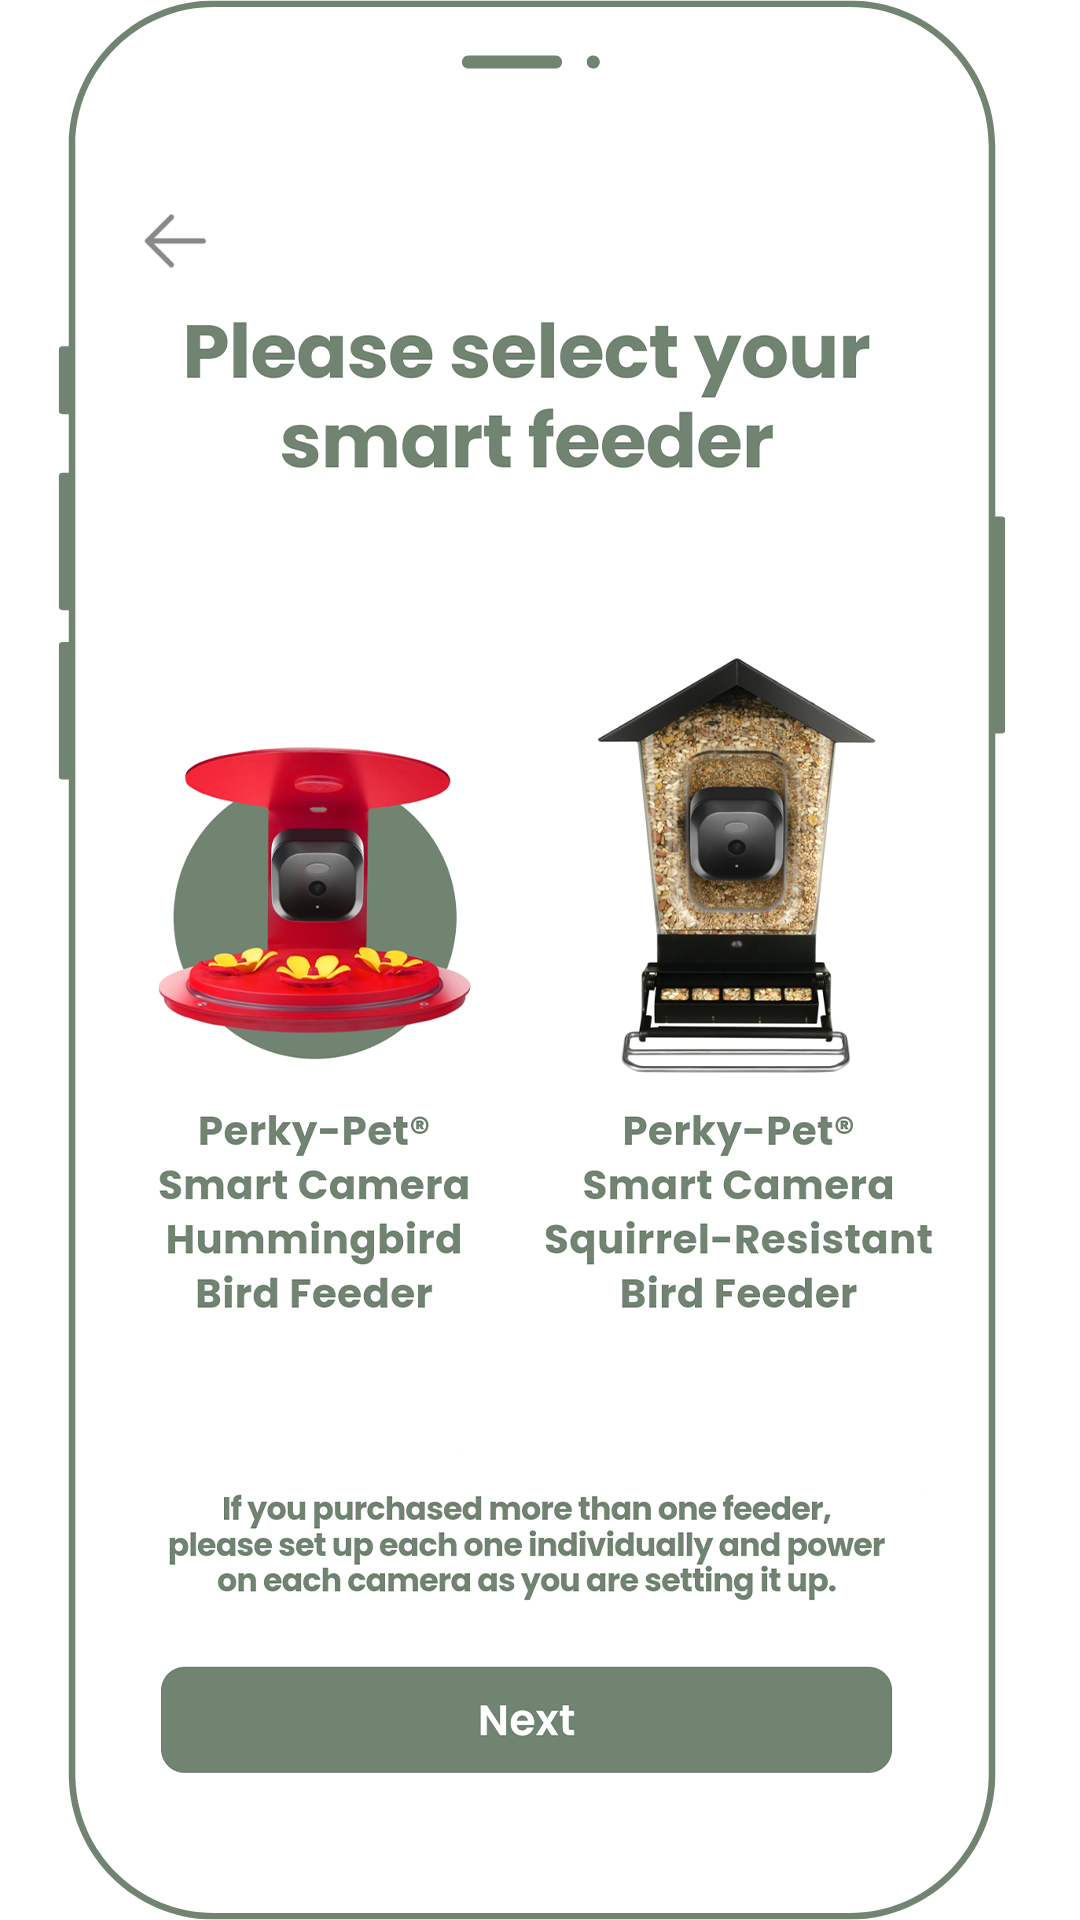
- Select your feeder model. If you’ve purchased more than one feeder, you’ll need to pair each one individually. Then click the Next button.
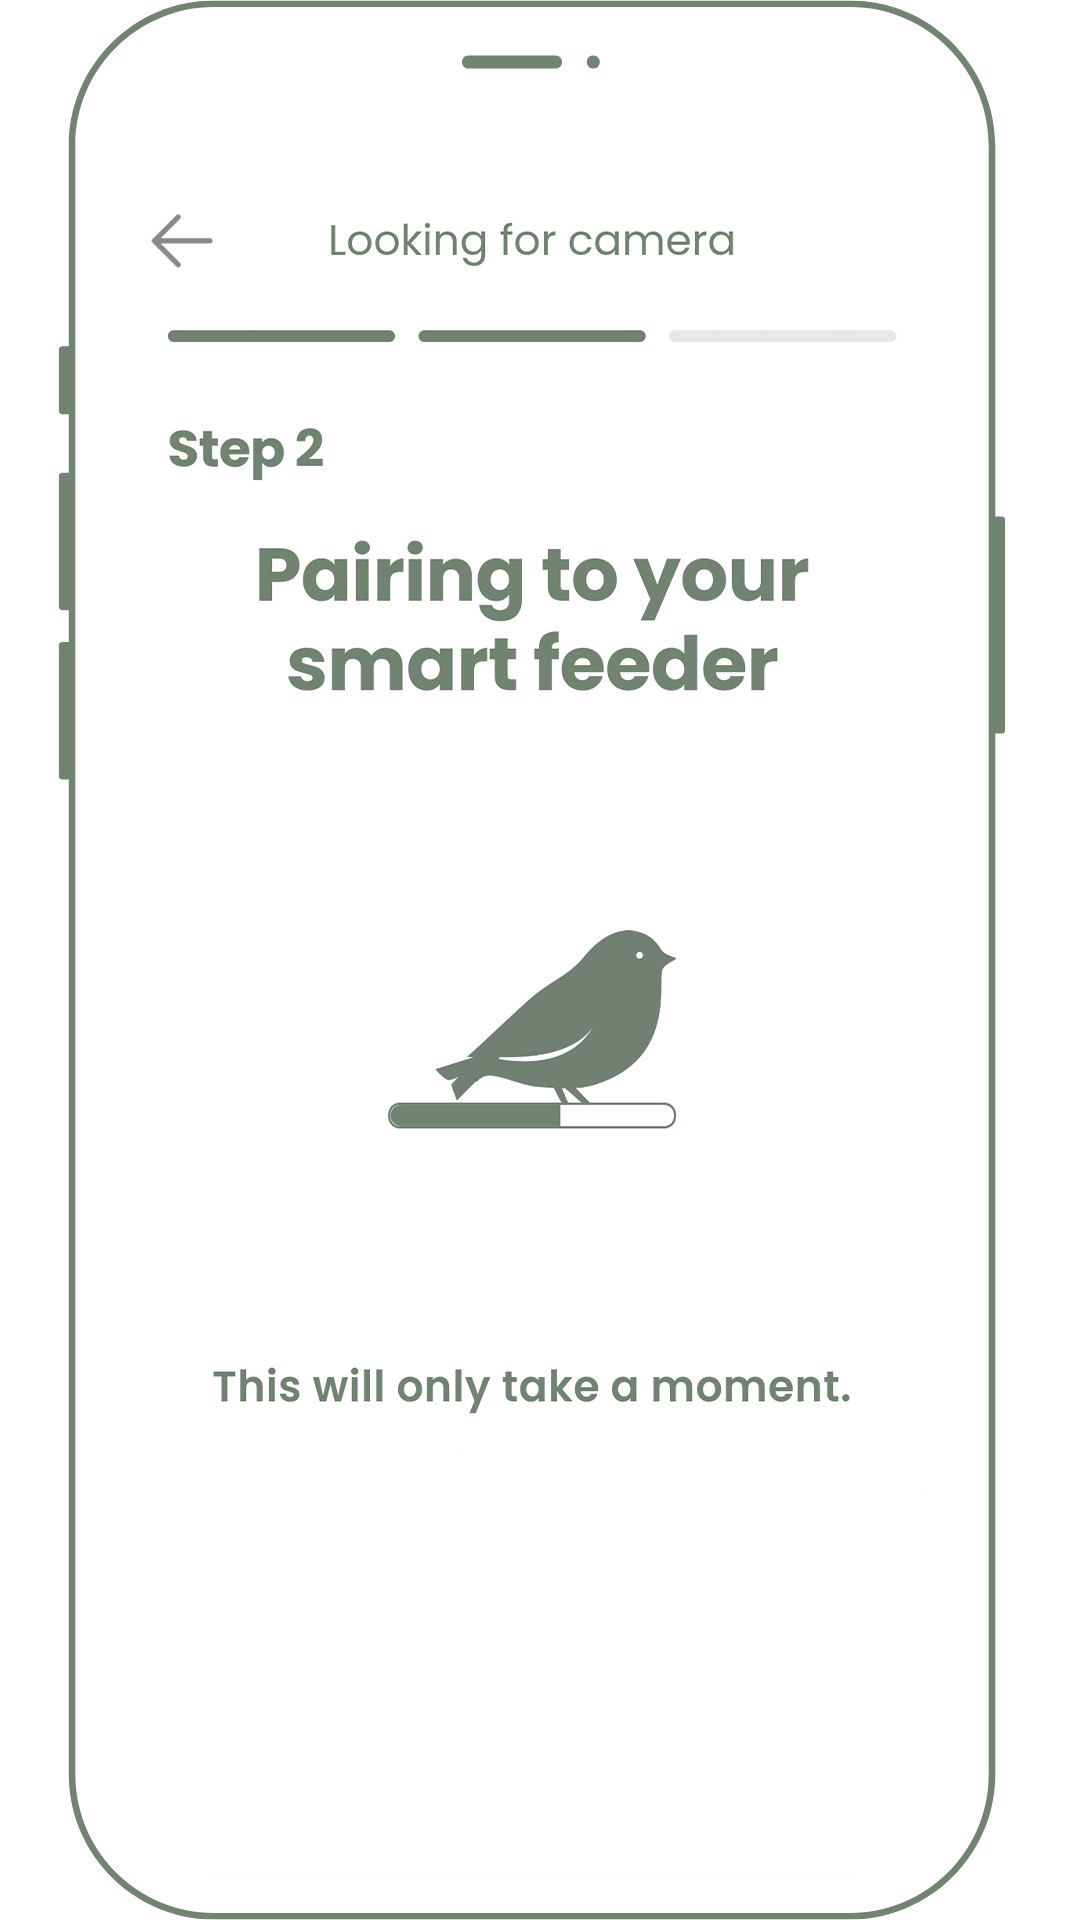
- Once your camera has been fully charged, power it ON. The camera LED light will blink green three times followed by blinking blue lights which indicates that that camera is in the pairing mode. Click the Next button within the App to begin pairing your camera.

Connect the feeder
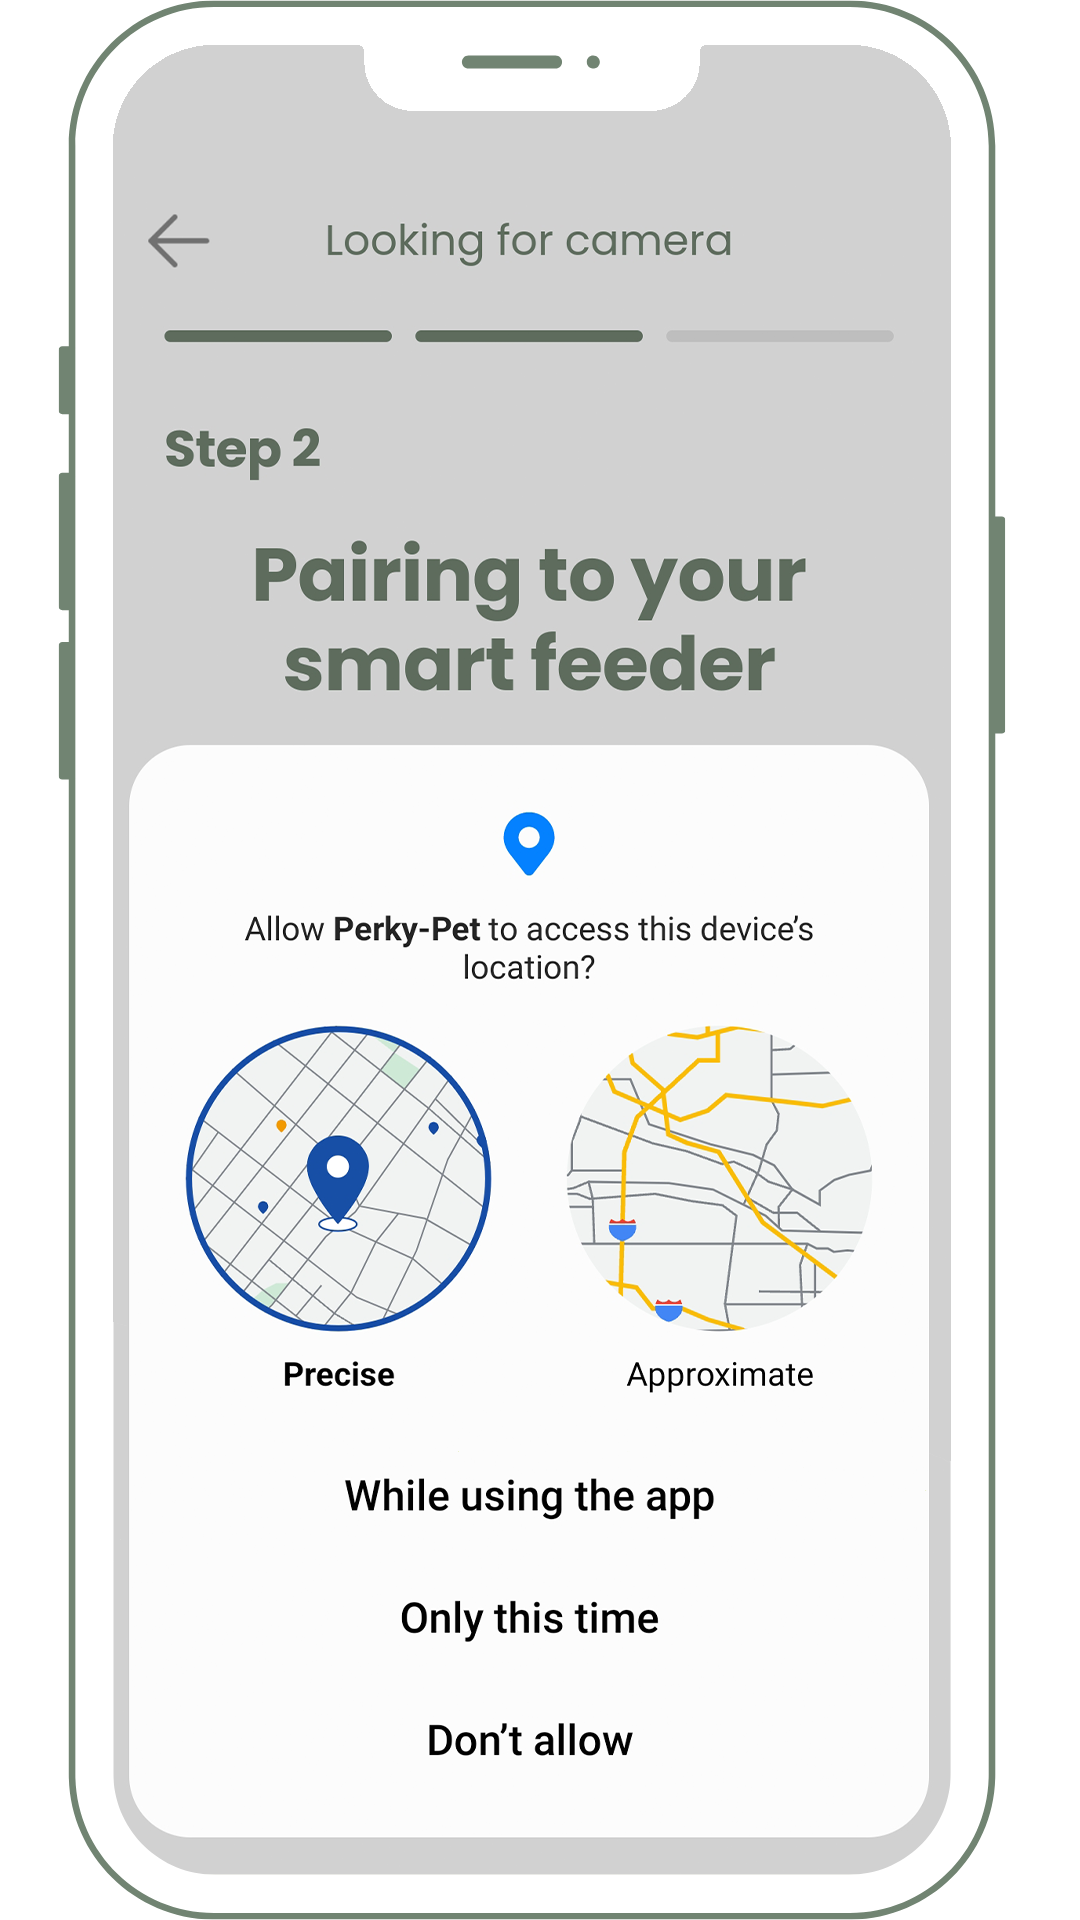
- Next, you’ll be asked to turn on location services. Select “Allow” or “Allow while using the app.” Location is only needed for the initial pairing. It can be disabled once pairing has been completed.
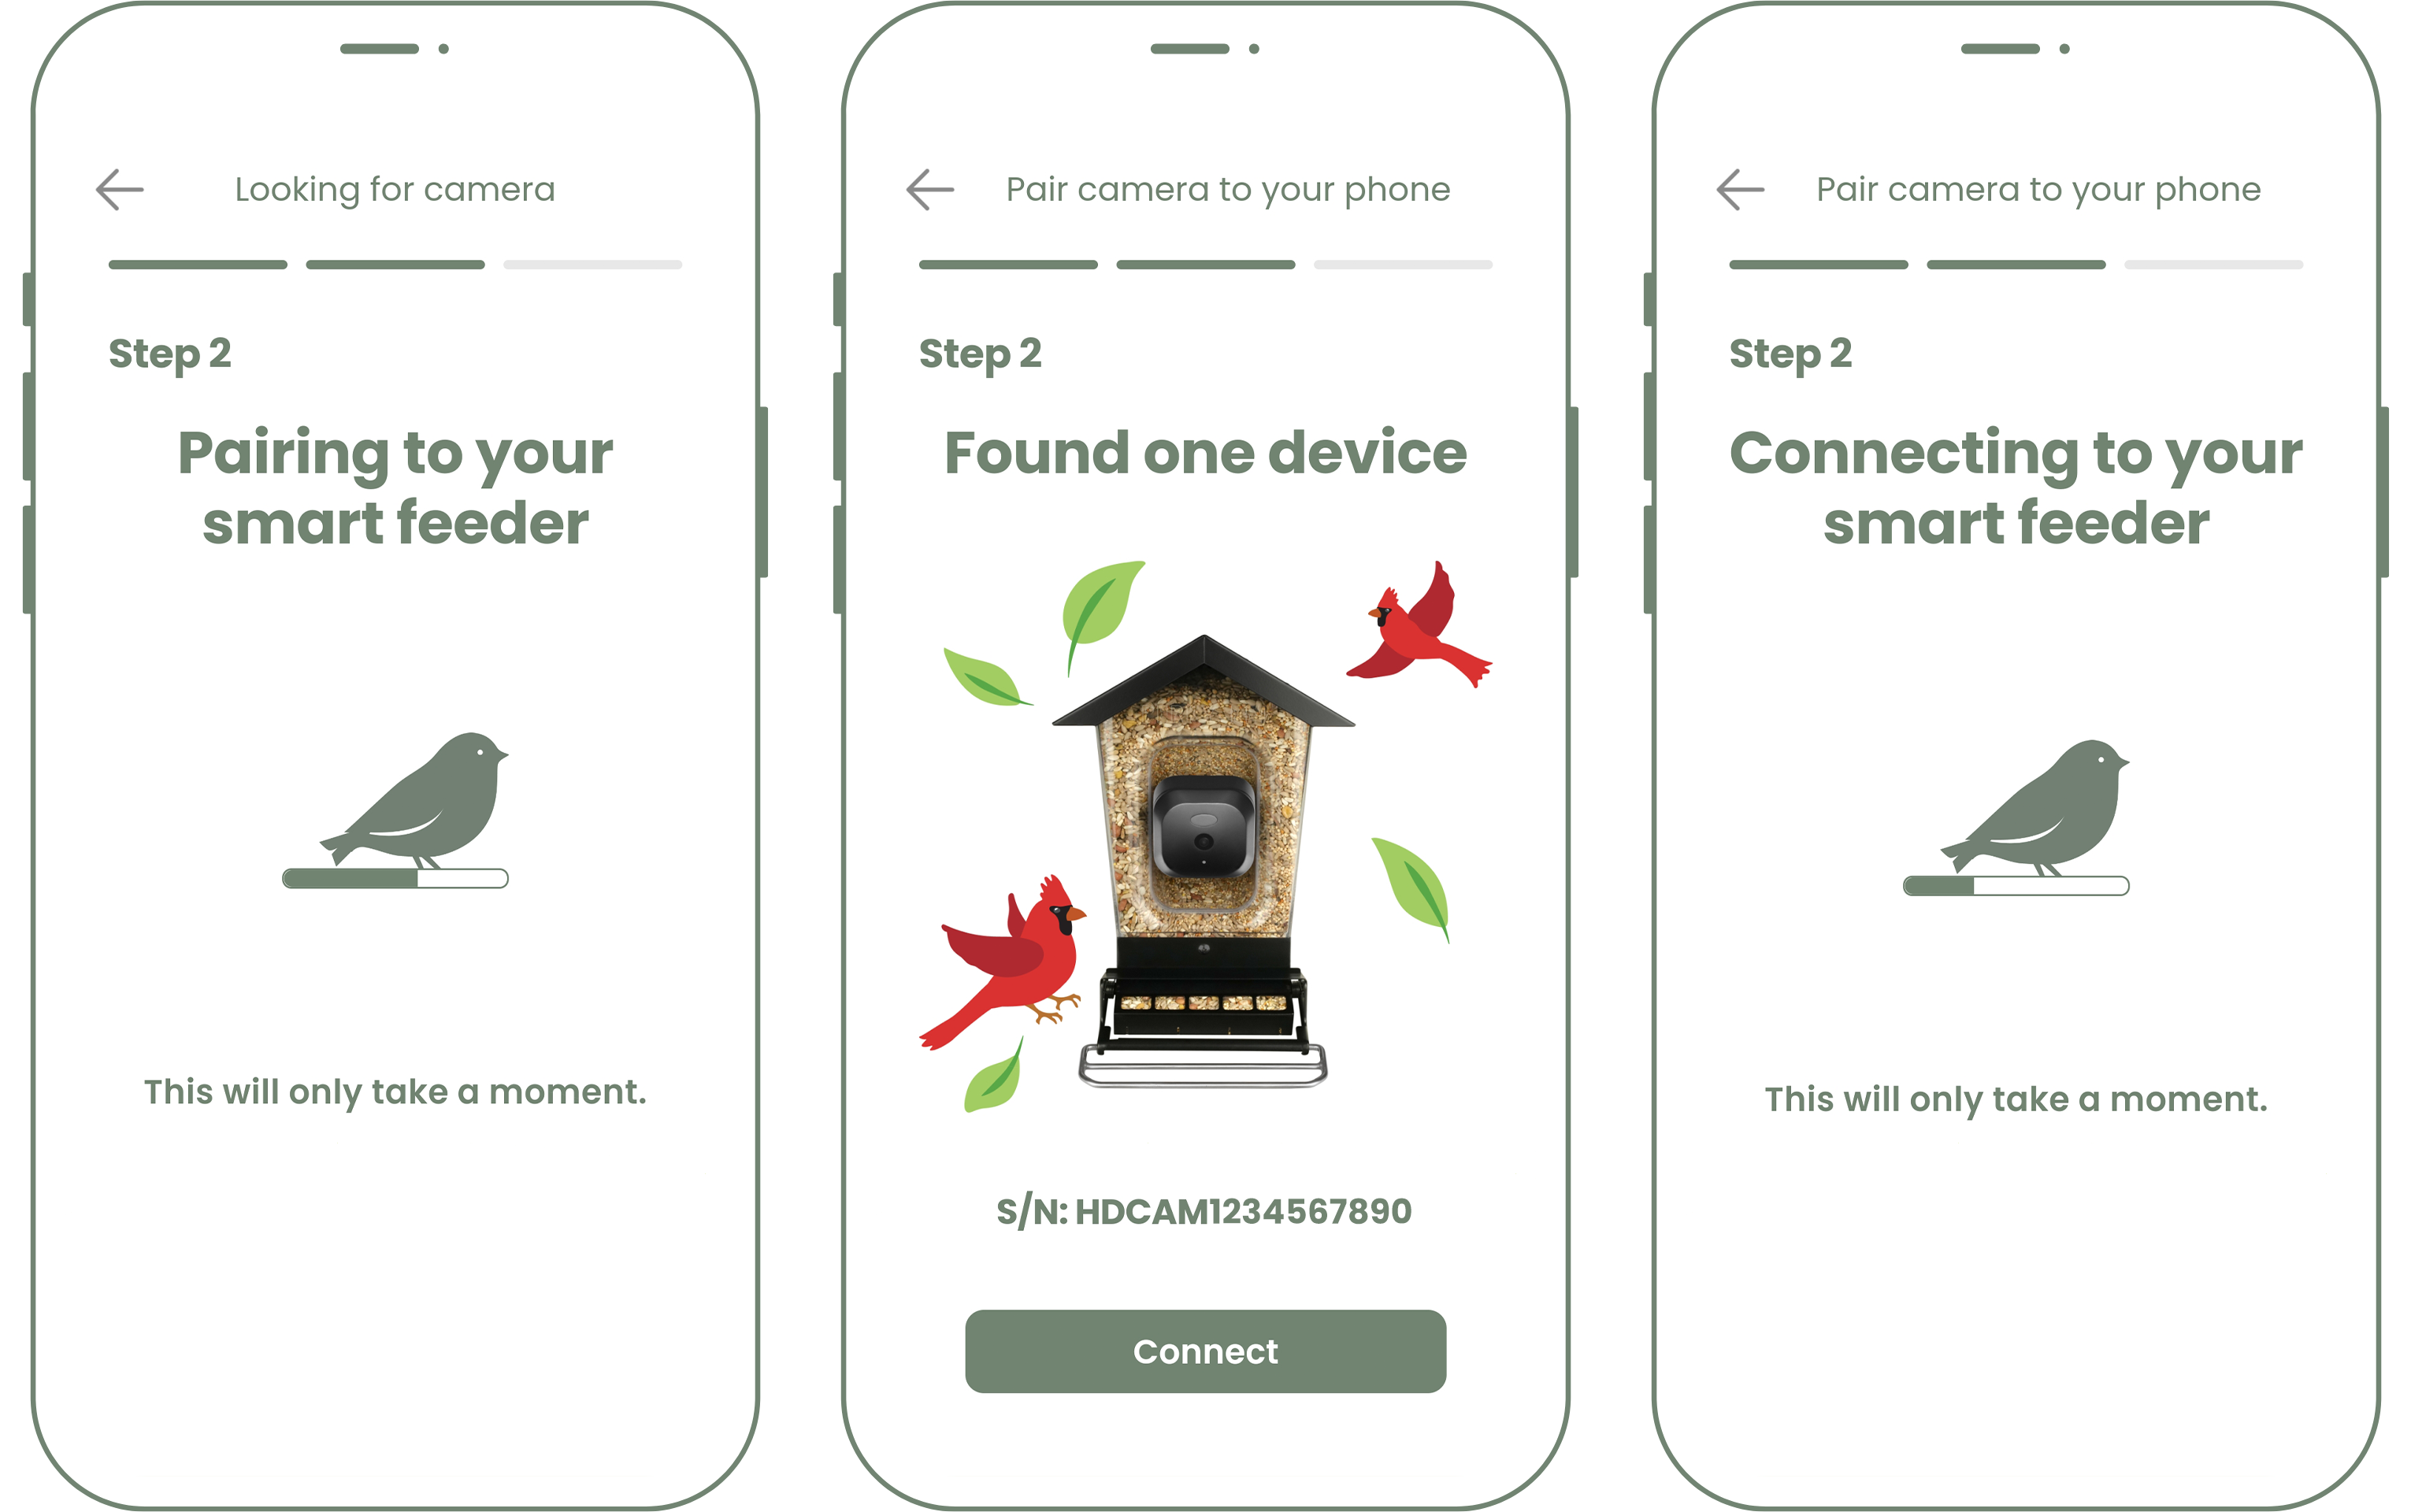
- When the device is ready to begin pairing, you should see a blinking blue LED light on the camera. A loading screen will appear on the app as it searches for the camera to pair.
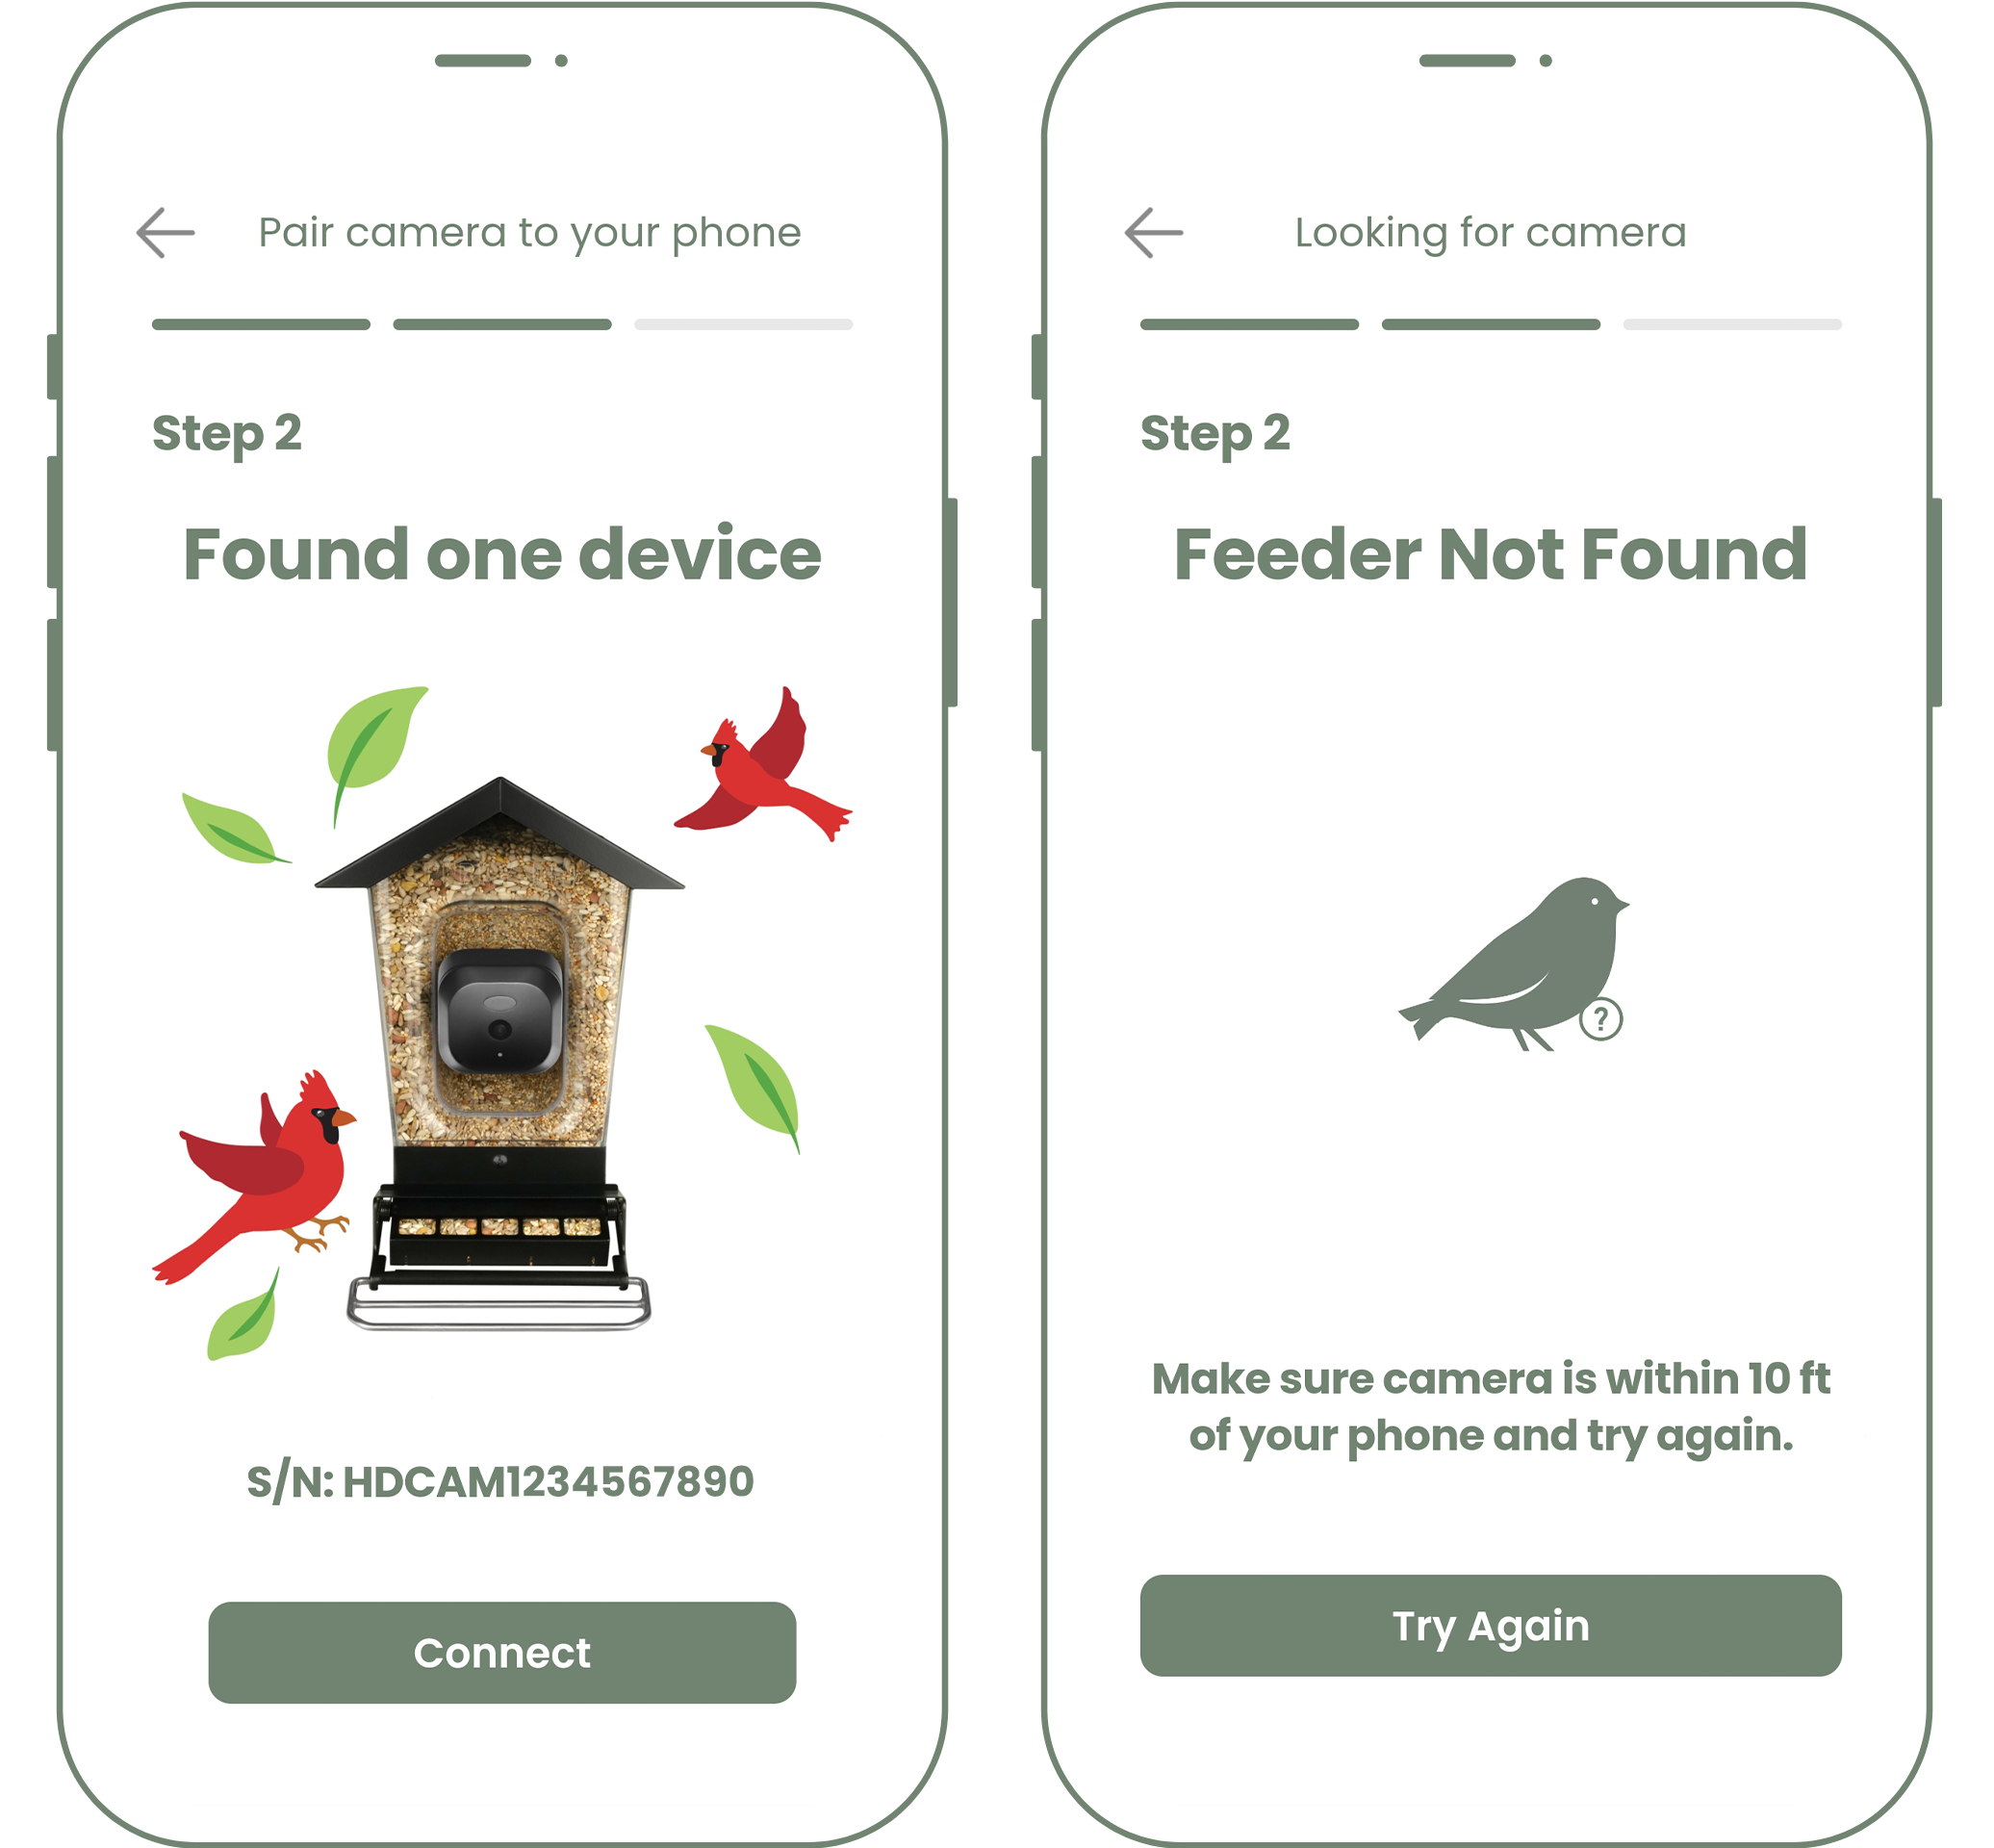
- Once the app finds your feeder, it will appear on the screen with the camera’s serial number. If more than one device has been found, select the one you wish to pair with, then click Connect.
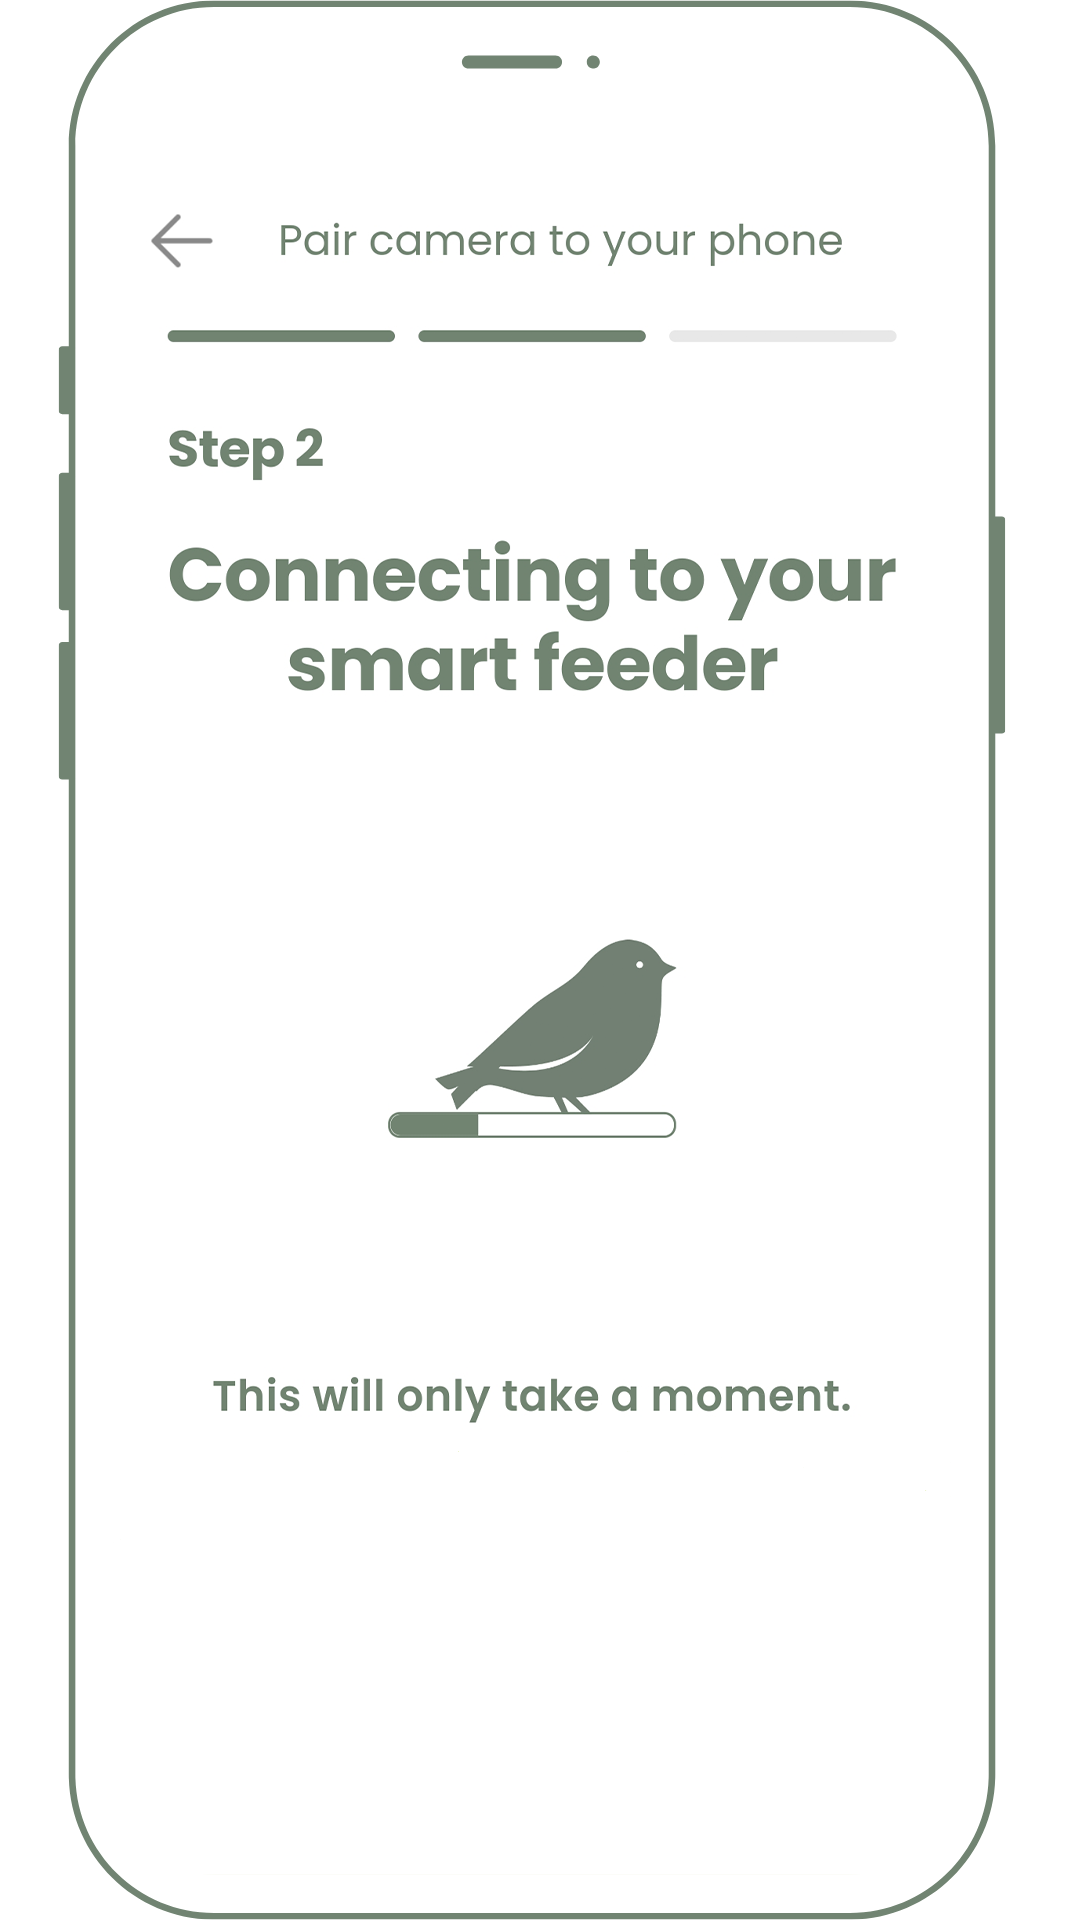
If a screen saying “Feeder Not Found” appears, make sure the camera you’re trying to connect to is powered ON and that it is within 10 ft of your phone. If it's still not working, try pin resetting the camera. To do this, insert a small pin or paper clip gently into the RST hole of the camera and hold for 5 seconds. You should then see 3 green lights, followed by blinking blue lights. If you don’t see the lights, power cycle the camera. If you still aren't seeing the 3 green lights and then blinking blue lights, please contact us. - You’ll see a loading screen as the app connects to your feeder.
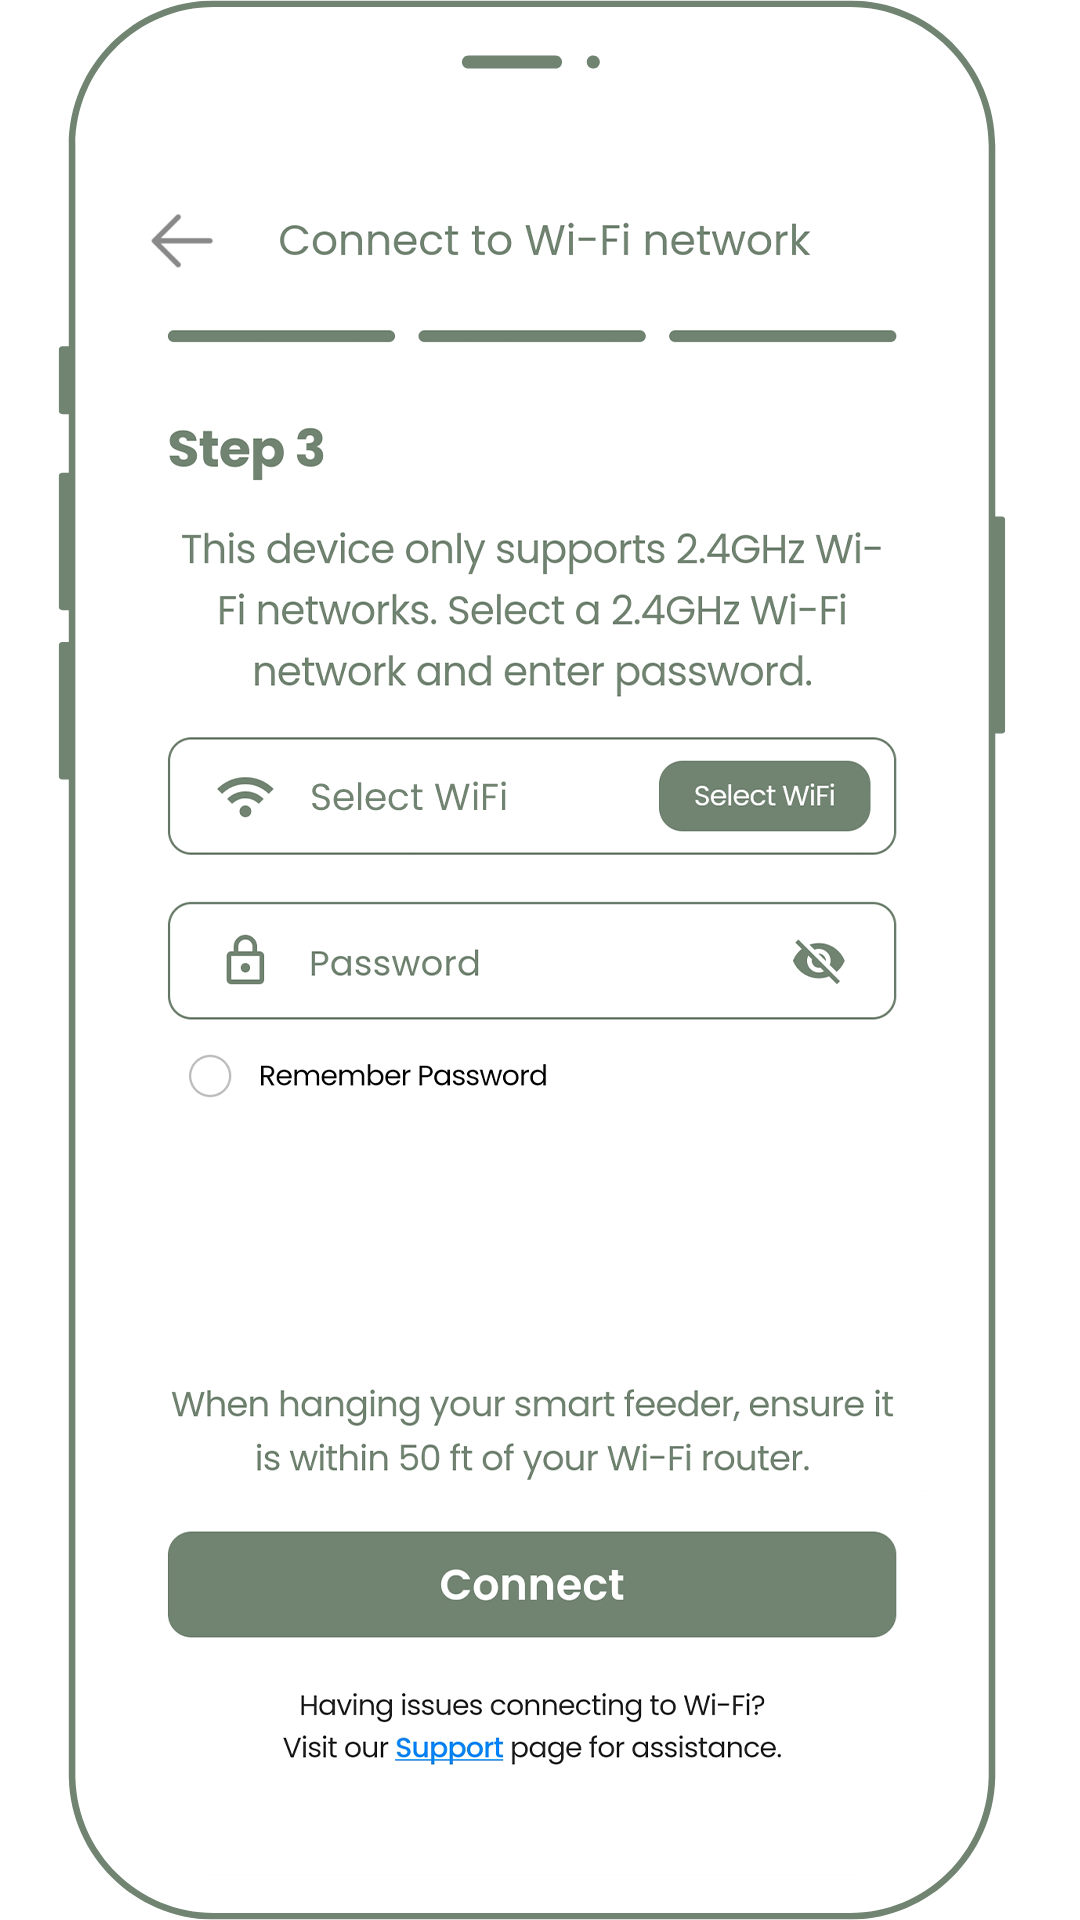
Connect to Wi-Fi
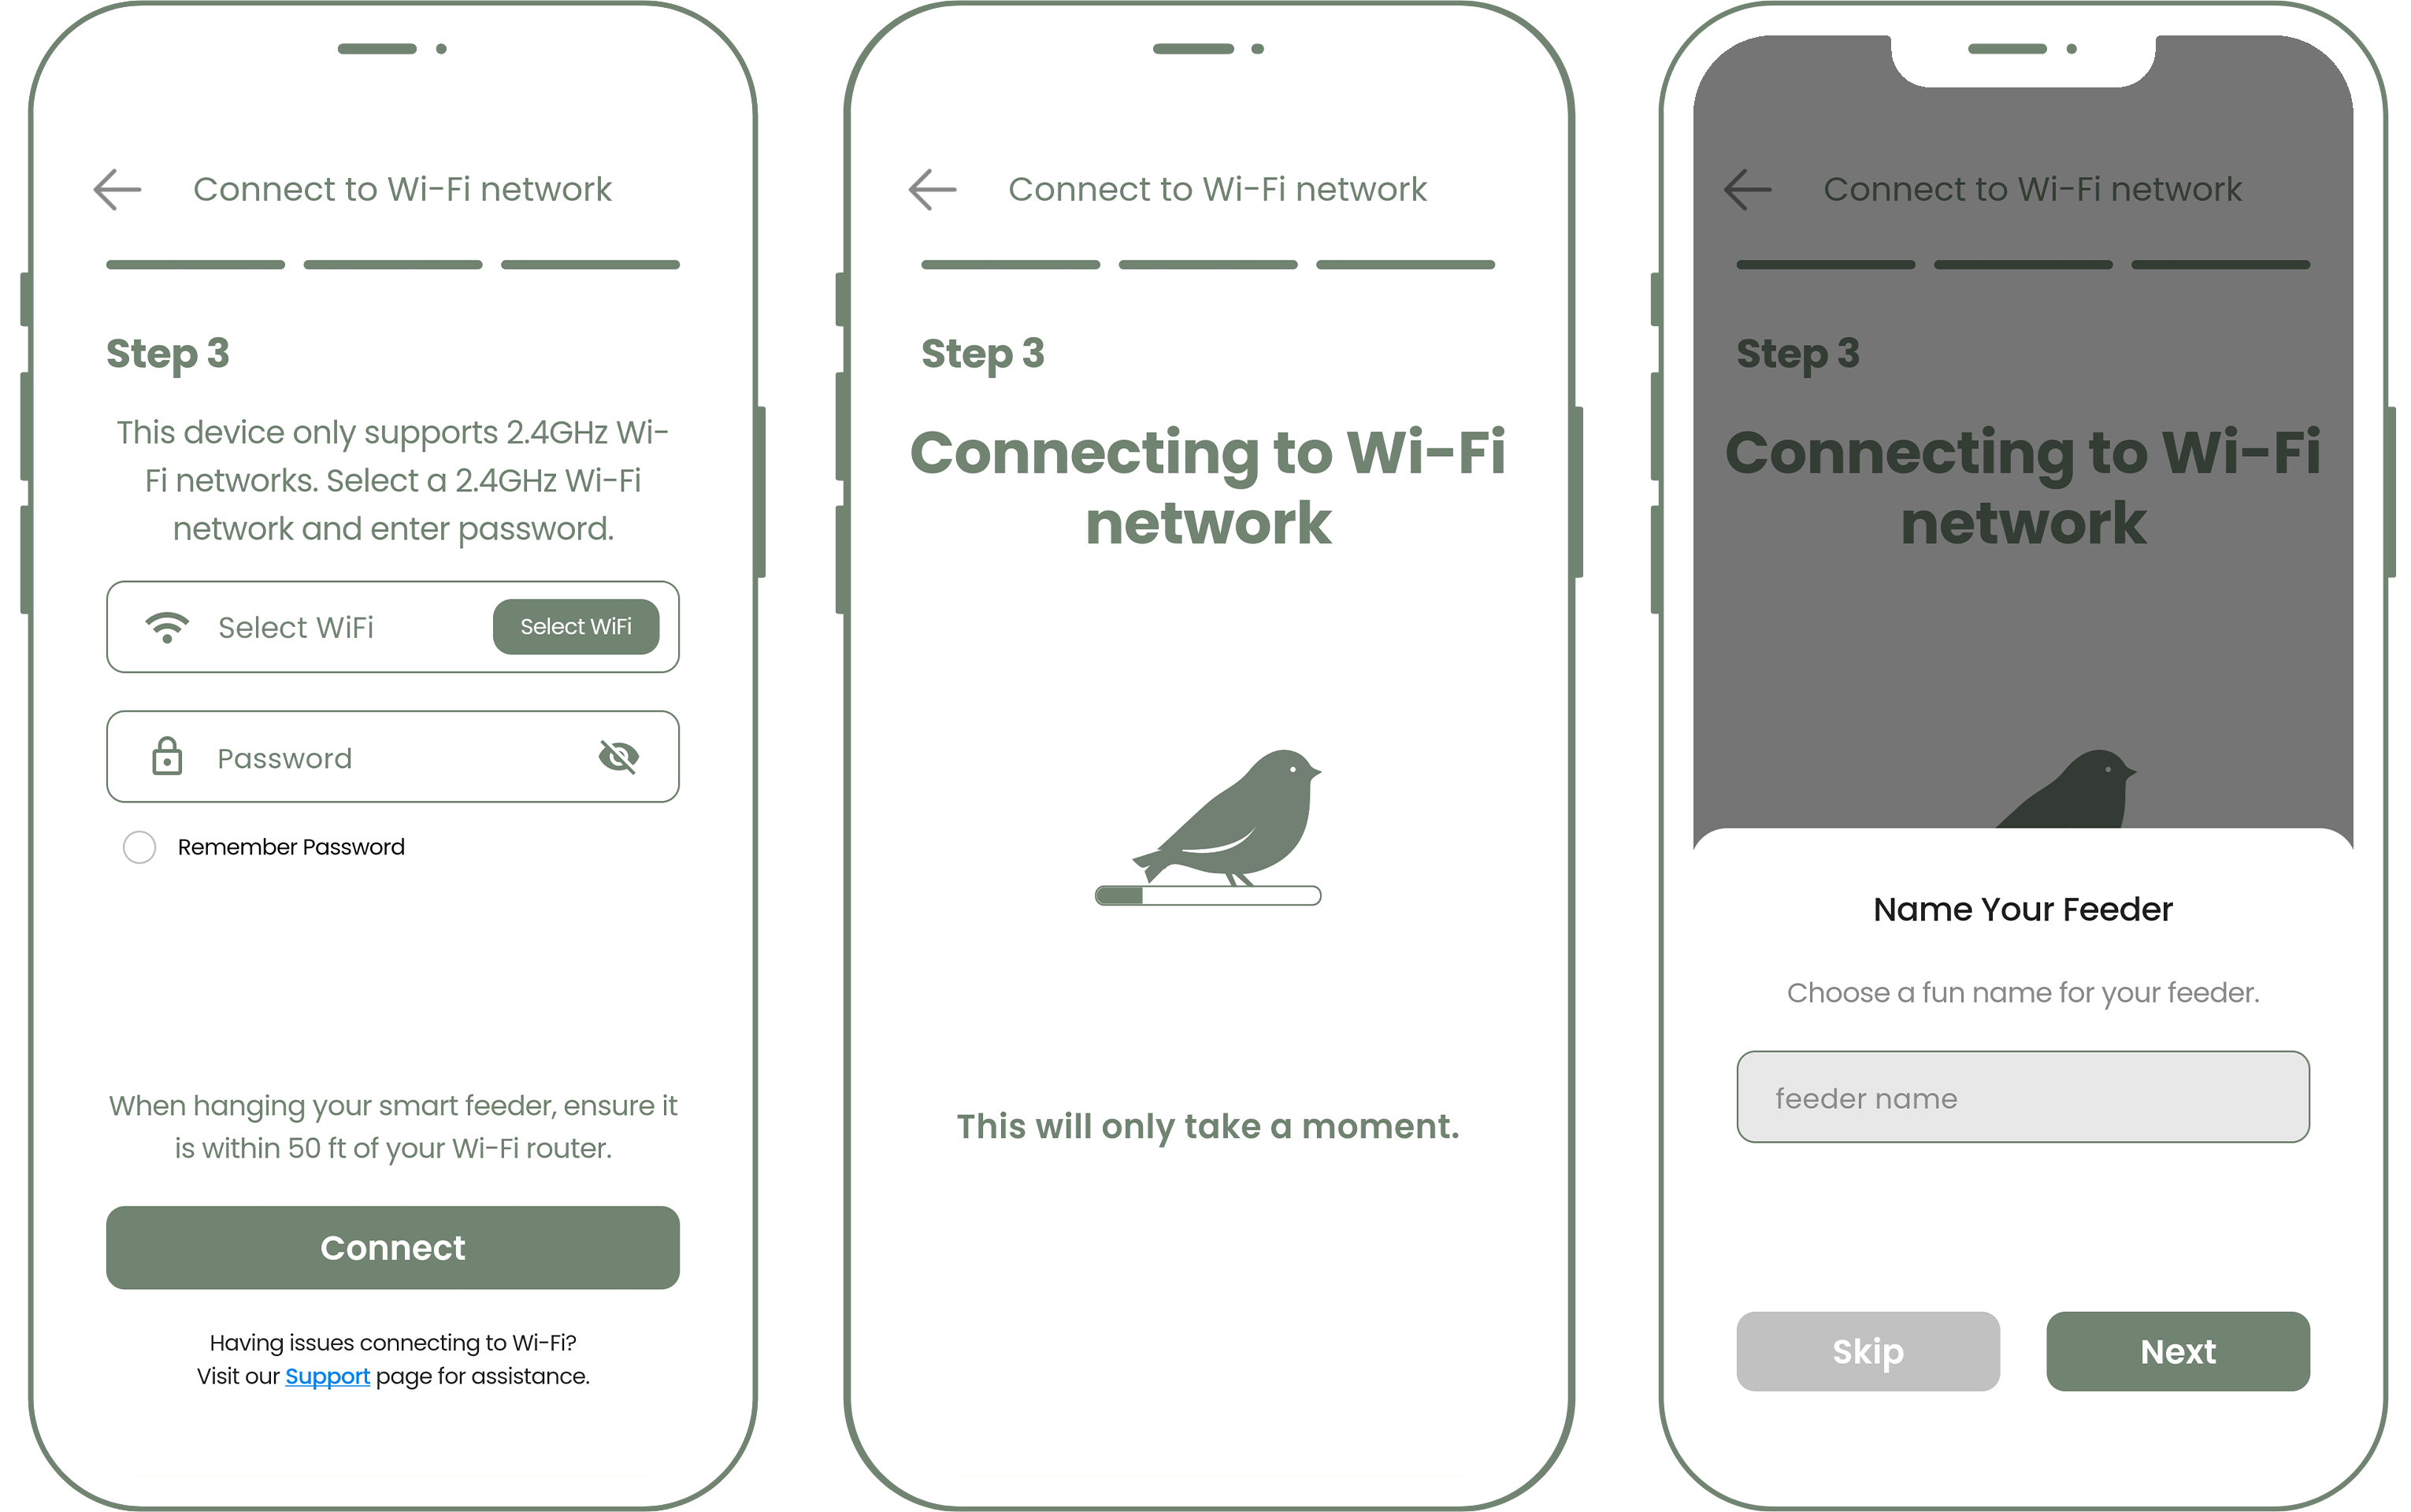
- Now it’s time to connect to your Wi-Fi network. Click the Select Wi-Fi button to choose your Wi-Fi network from the list of available networks. Make sure you are within 50 ft of your Wi-Fi router and that your phone is connected to the same Wi-Fi network you want to connect your camera to. This device only supports 2.4GHz Wi-Fi networks.
If you don’t see your network on the list, you might have an incompatible network. - Once you select your network, enter your Wi-Fi password and click Connect.
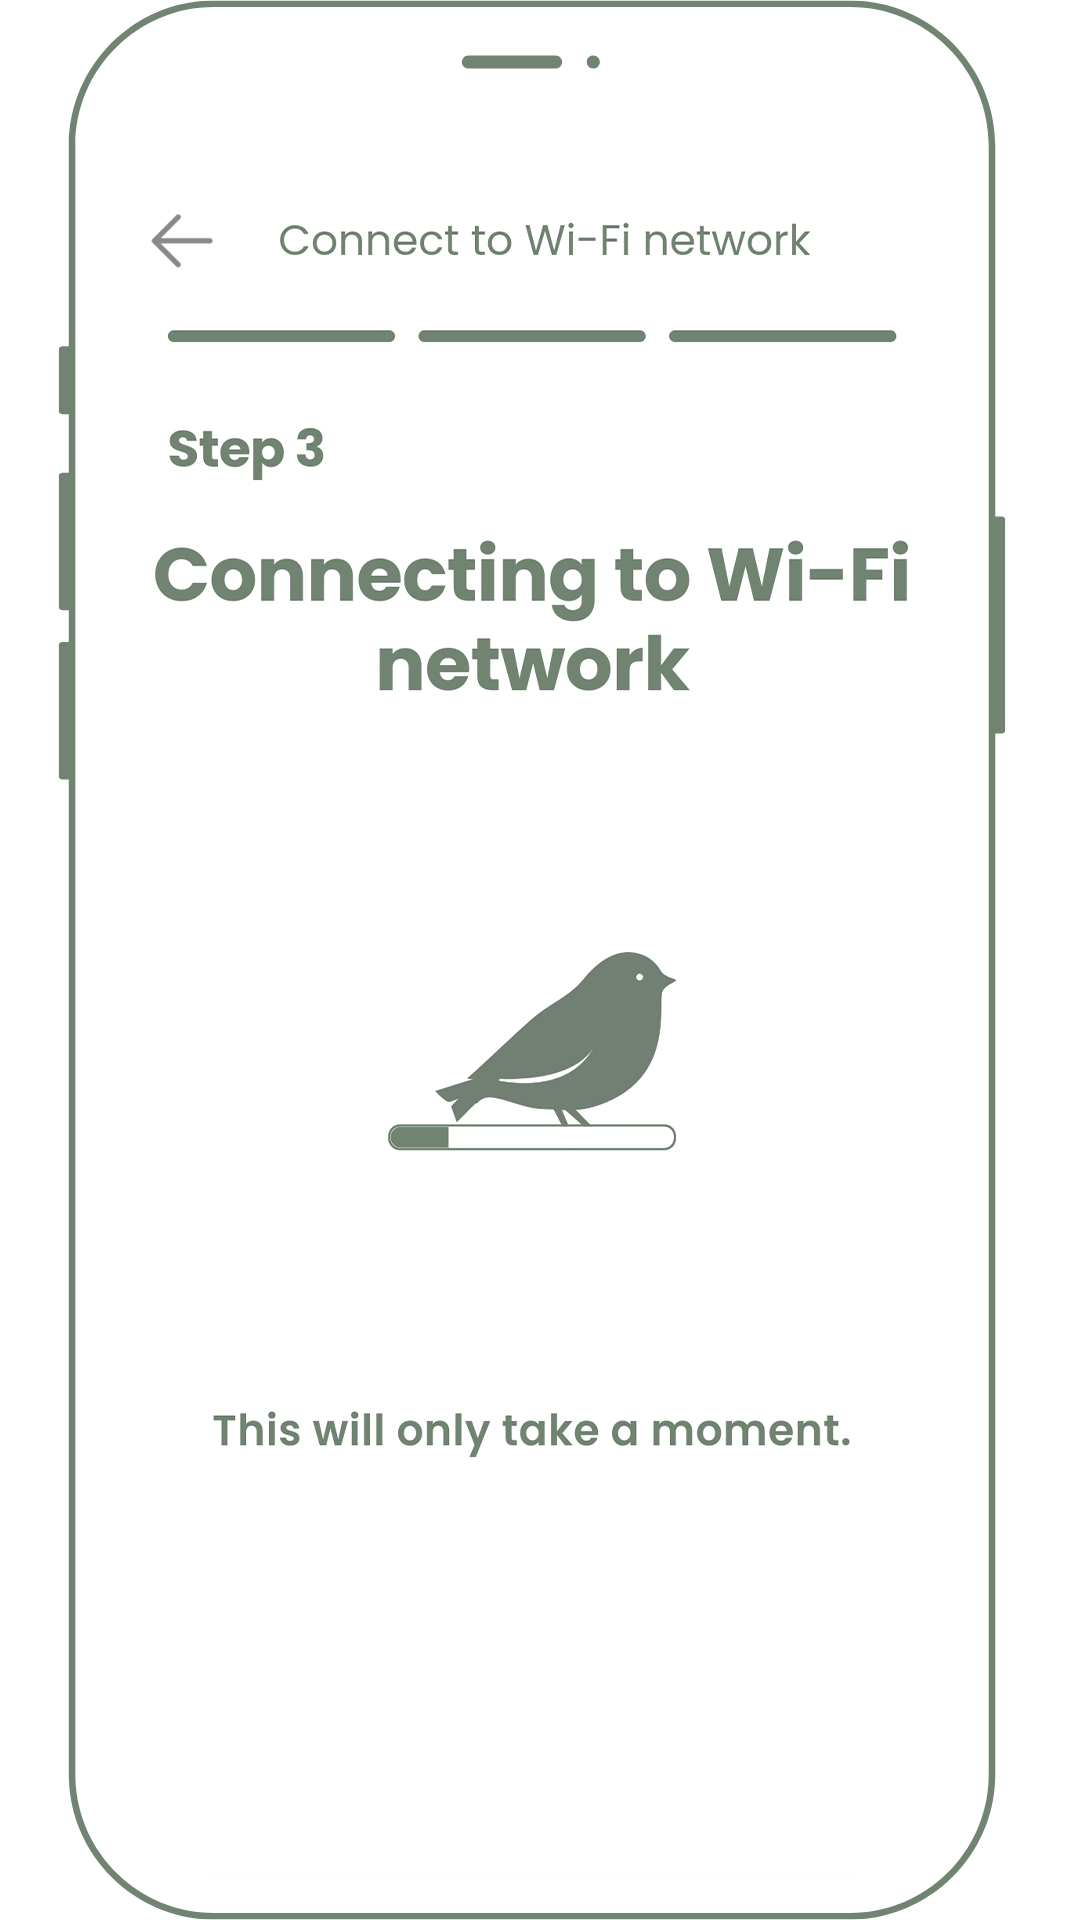
- As the camera begins to connect to your Wi-Fi, you’ll see a loading screen.
- You’ll see a blinking green LED light on the camera once it’s been successfully connected to your
Wi-Fi network.
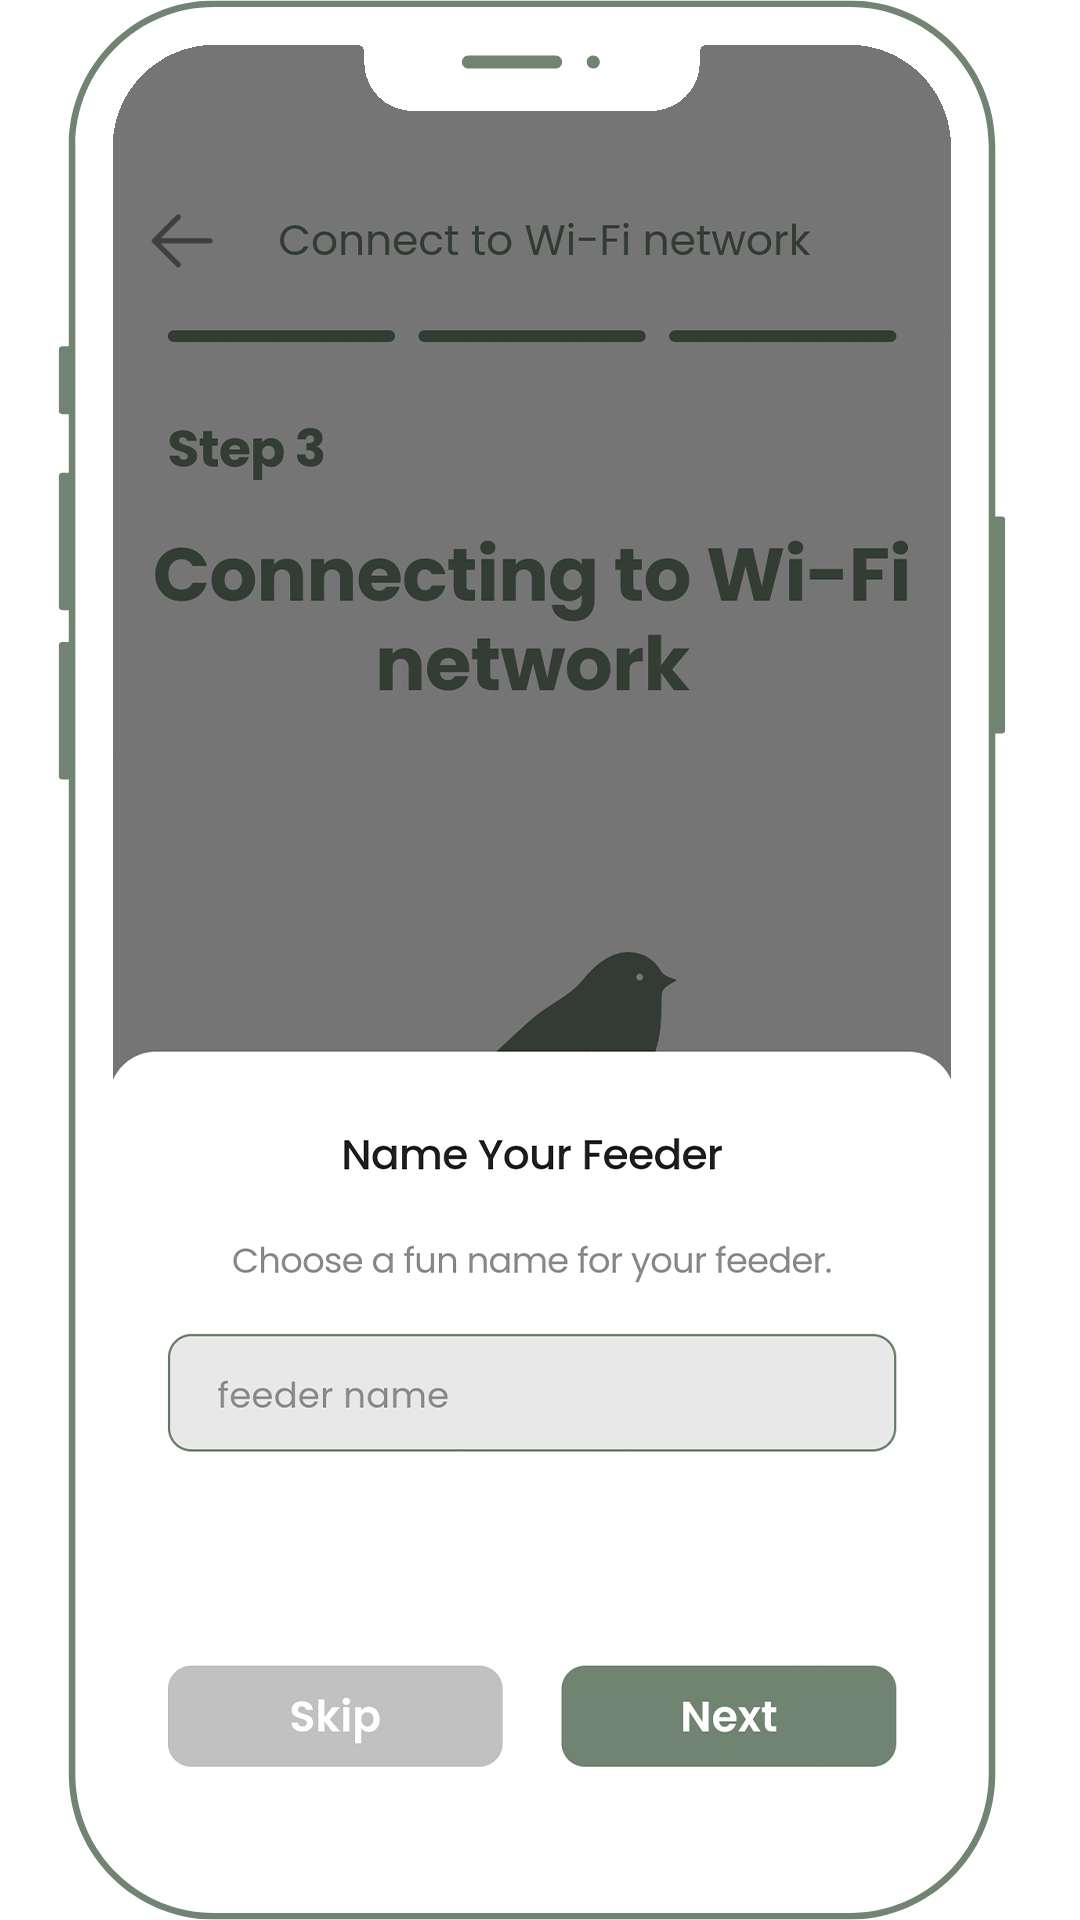
If the connection fails, you’ll be prompted to try again. If the failure persists, check our Wi-Fi troubleshooting . - Once successfully connected, you’ll be asked to create a name for your feeder.
Ready to go
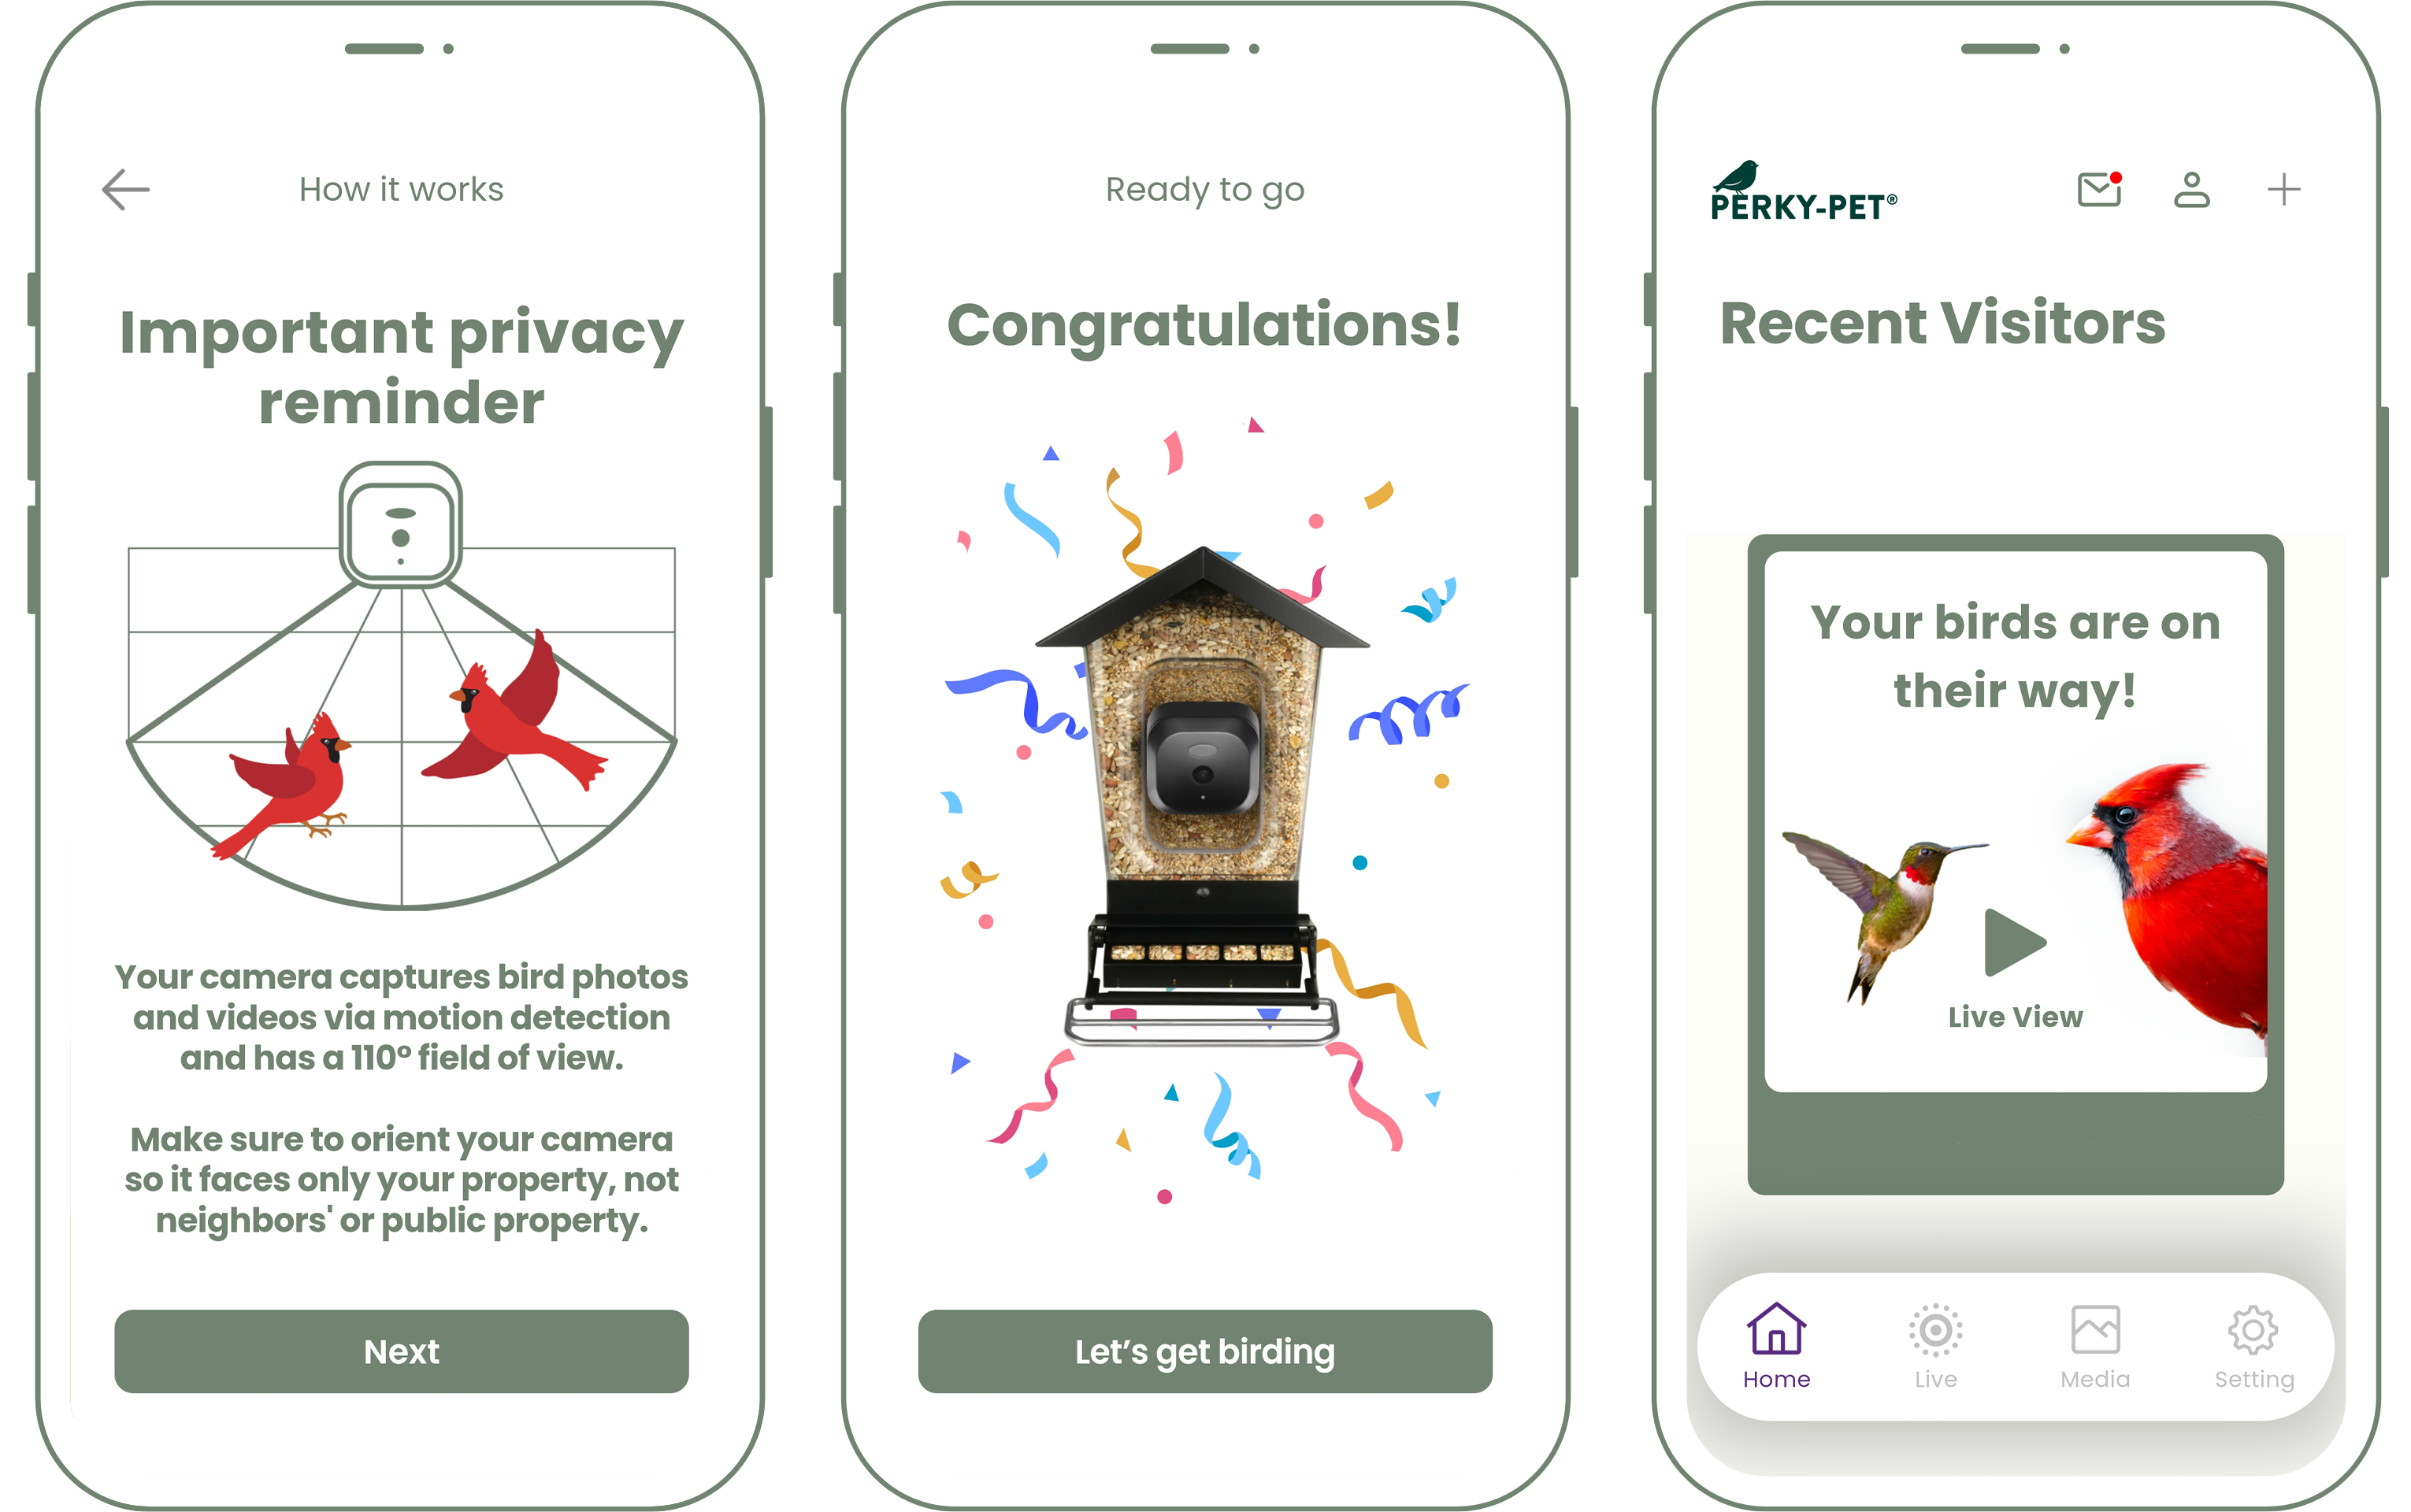
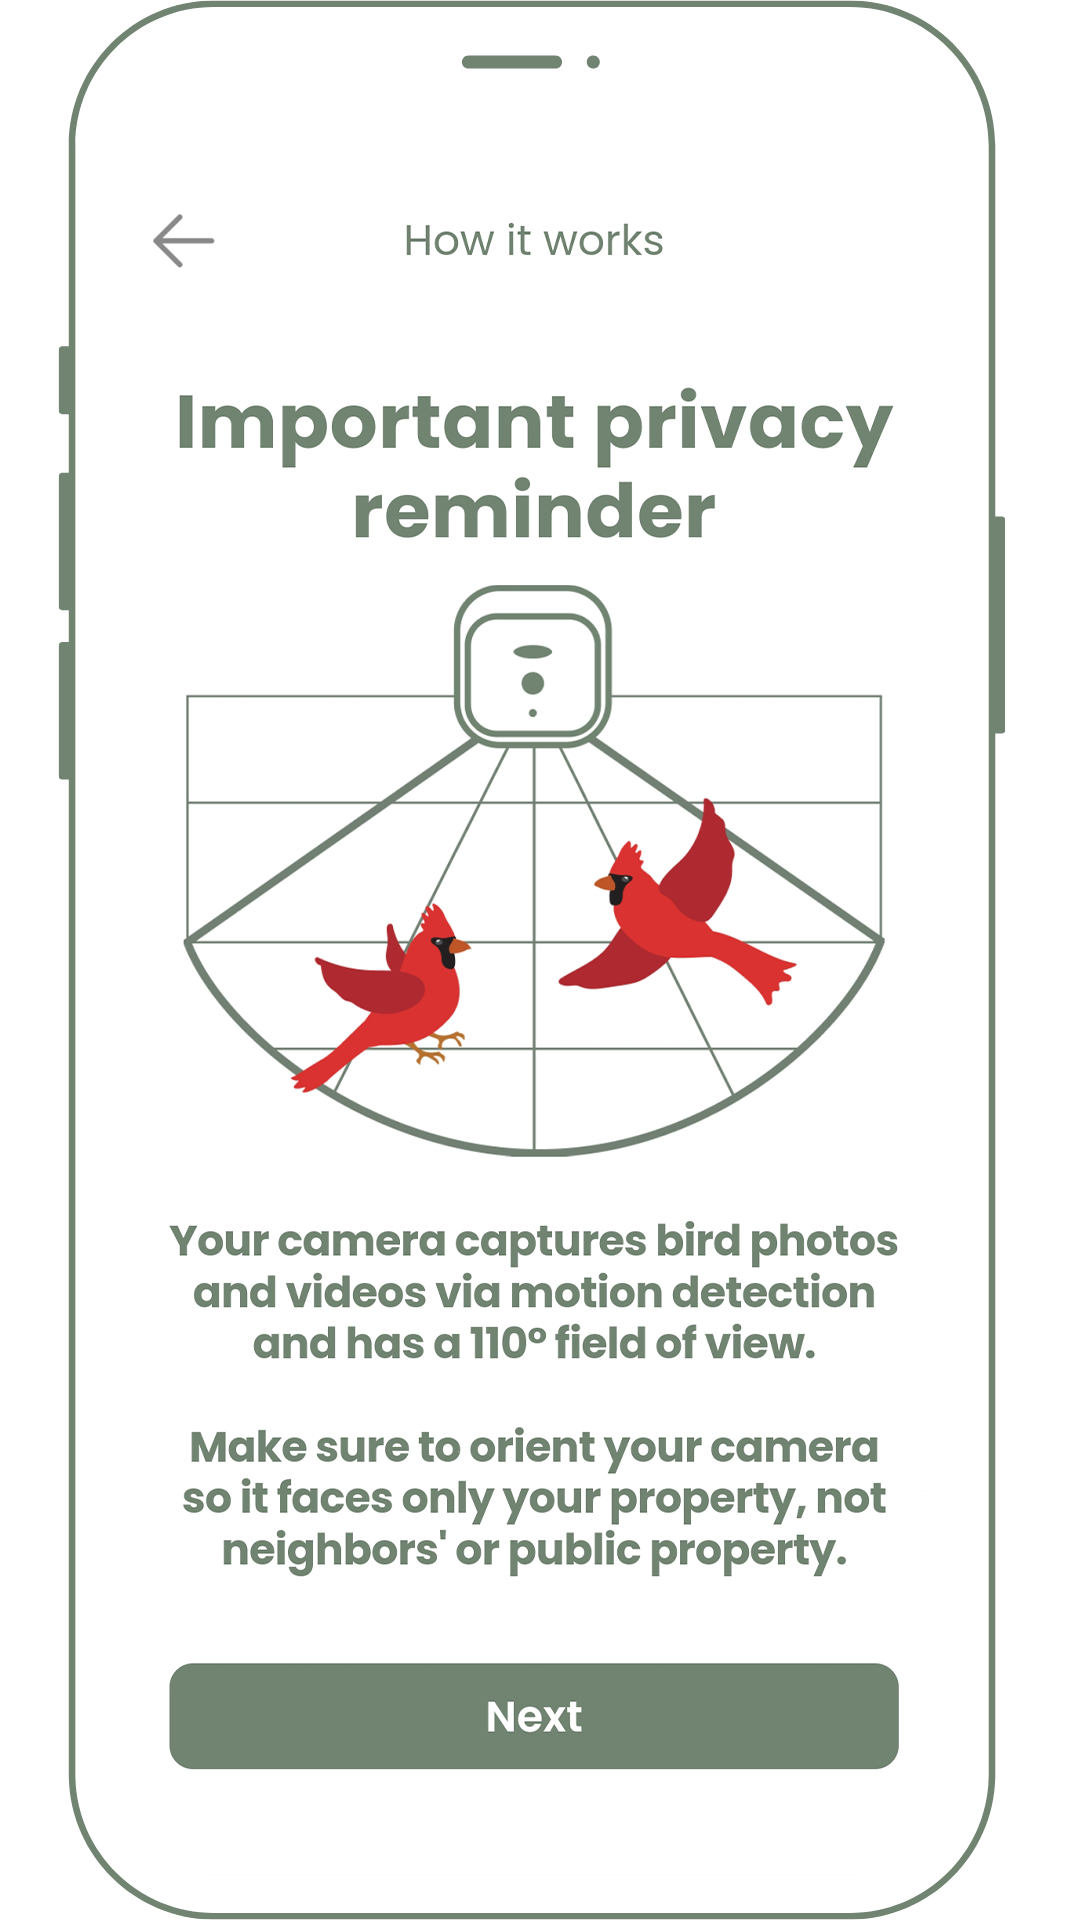
- Now that your camera is all set, it’s important to remember the privacy of others. Your camera captures bird photos and videos via motion detection and has a 110° field of view. When placing your feeder, make sure to orient your camera so it faces only your property, not neighbors’ or public property.
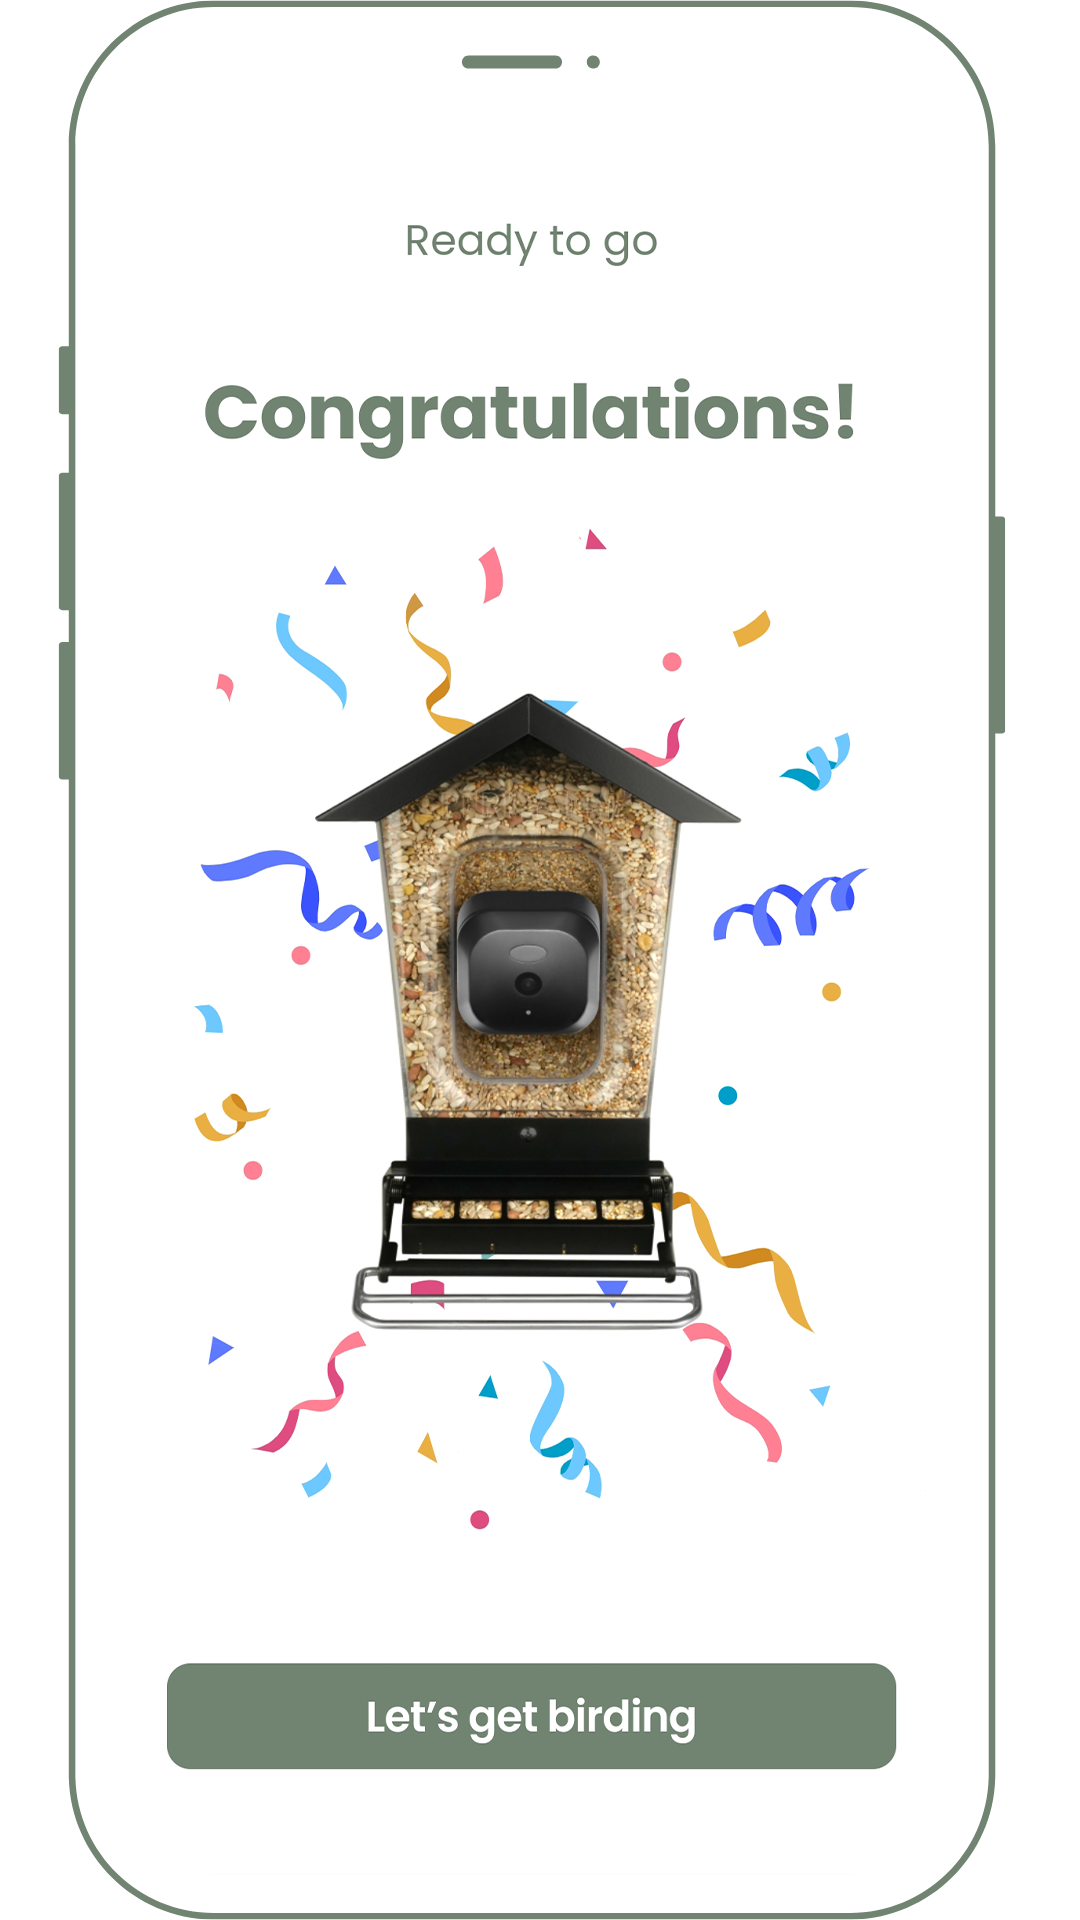
- Congratulations, your feeder is ready to go!
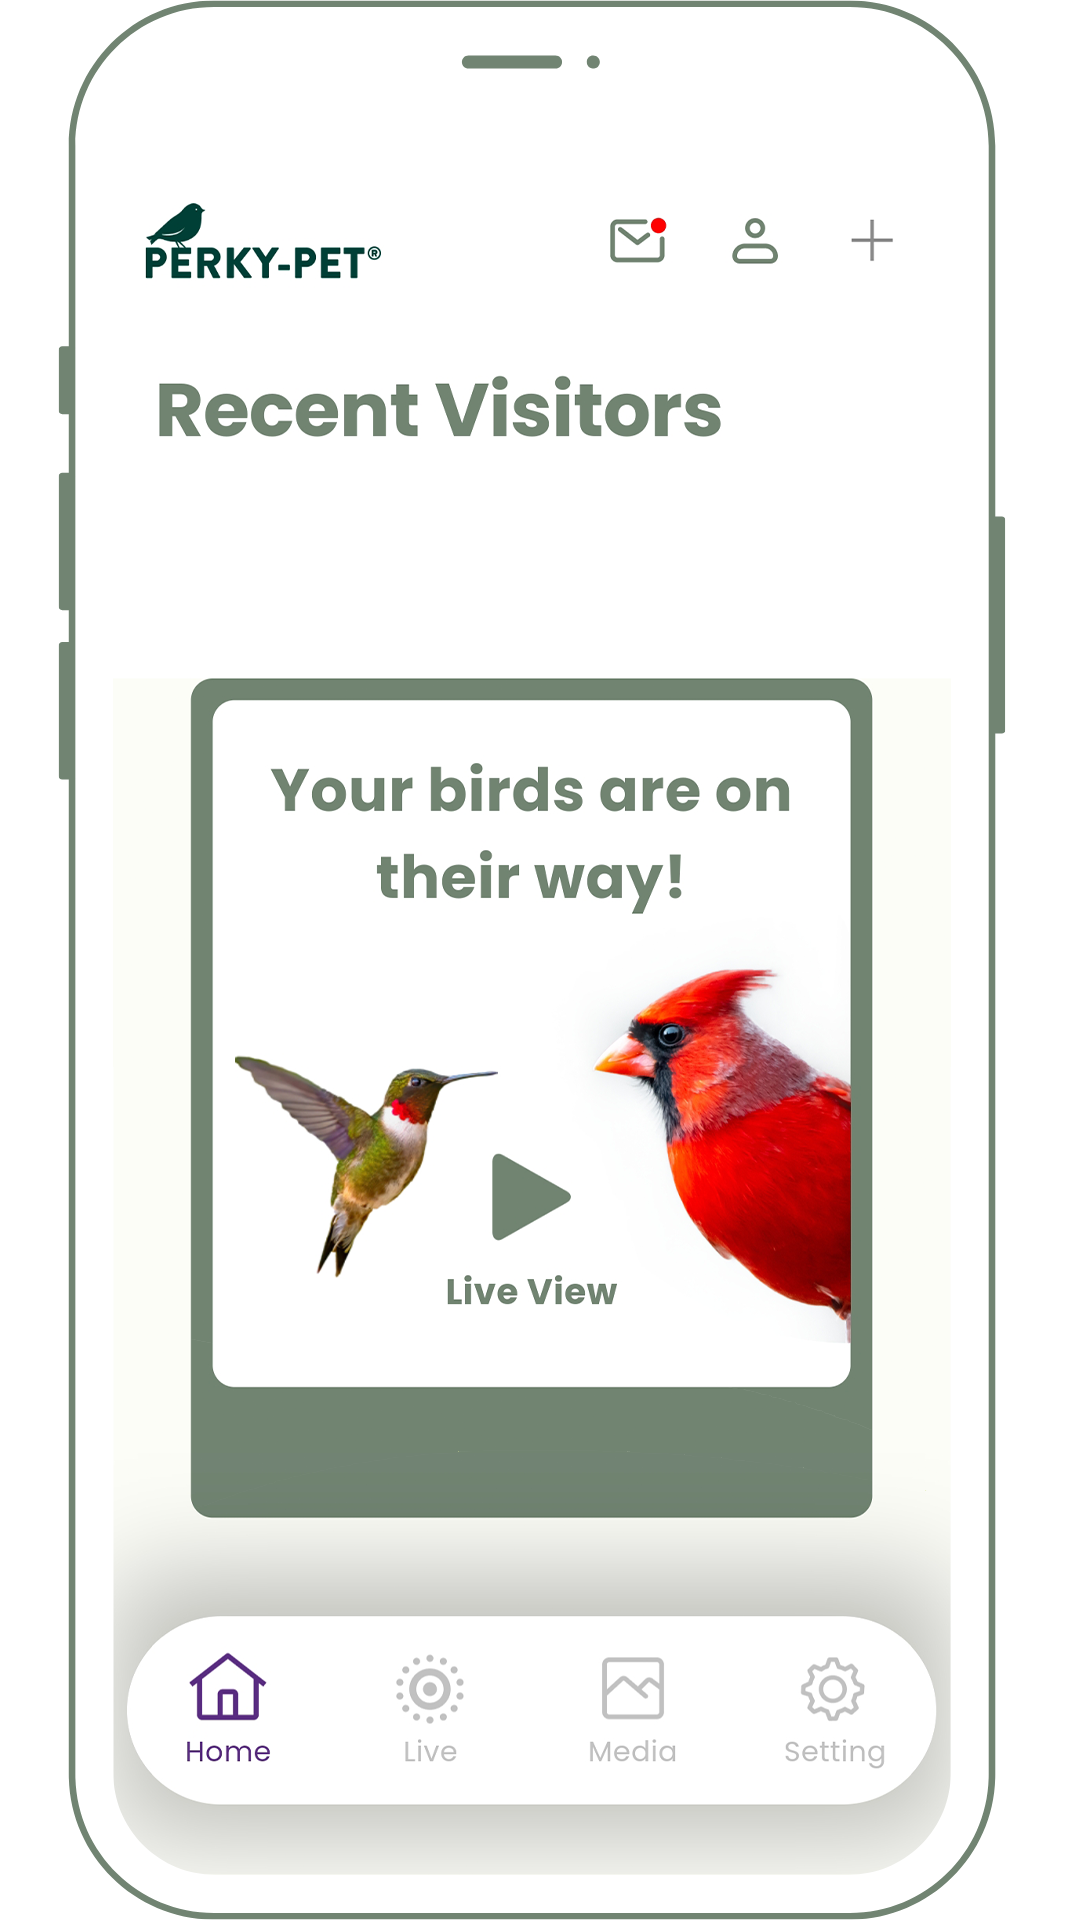
- Click the “Let’s get birding” button to navigate back to the home screen. You should now see your feeder listed. You can visit the live view tab to test that your camera is working.
Visit our Quick Start Guide to learn everything you need to know about setting up and hanging your new feeder.